Author Topic: "Piper's" Restoration Progress  (Read 26571 times)

0 Members and 1 Guest are viewing this topic.

Offline RainMan

  • Lifetime Member
  • *****
  • Posts: 5401
  • Rick
Re: "Piper's" Restoration Progress
« Reply #45 on: December 26, 2012, 09:24:15 PM »
Wow that red and white interior theme is very sharp!  I've never seen that combo before

Offline TurdPolisher

  • Member
  • **
  • Posts: 160
  • Bucket List # 3 under way
Re: "Piper's" Restoration Progress
« Reply #46 on: December 27, 2012, 05:56:35 AM »
Wow that red and white interior theme is very sharp!  I've never seen that combo before

Hey Rainman..............yeah, join the club as I suppose there are few around and not many people have seen the combo from what I am gathering. Sure would like to know how many were produced but I will never know.  I really got lucky as it is a super sharp combination indeed.....but would have never known it until I researched the cowl tag.  In about 7 months I'll be ready to work on the inside.
If you are going to do it wrong........you might as well do it RIGHT!

Offline TurdPolisher

  • Member
  • **
  • Posts: 160
  • Bucket List # 3 under way
Re: "Piper's" Restoration Progress
« Reply #47 on: March 20, 2013, 01:55:57 AM »
Well it has been a long time since I posted last for an update and thought I would drop in to share with all of the progress on Piper. 

During the winter months, I spend about 120 hours  on my back prepping and painting the undercarriage of the car. Thank God for space heaters as 32 degrees in the garage is much better then 17 degrees.

I used various wire wheels to clean off enough dirt, greasy dirt...........and MORE greasy dirt to fill 3 gallons of a 5 gallon bucket from the bottom of Piper. Talking about a dirty dirty job.  One day I was so covered in so much grime that it took literally one hour in the shower getting it off and I still had grease in my hair.  If you ever do this, I highly suggest a painters hood or a ski mask to keep the grime off. And it will get EVERYWHERE!!

After is was cleaned it was then scrubbed with thinner and scuffed with 120 grit paper.  Two coats of Rust Bullet was applied to the bare metal.  This is Great stuff for rust protection that has actual metal in the spray. Following that, I shot 2 coats of Eastwood Chassis black  which left a very nice satin finish. the sway bar and springs were cleaned, epoxy primered and sprayed with cast iron paint from Dura Coat.

During the process, all the brake springs, shoes, front eye bushing on the springs were replaced and rear OER shackles were installed.  As the original smaller sway bar was broken, it was replaced with a 3\4 rear sway with poly bushings installed at the sway bar. KYB Gas-Adjust shocks will do well and they look SHARP in aluminum silver against the satin finish.  As the fuel tank had a large dent in the corner it it too was replaced and the fuel sending unit was replaced since I was there anyway.  It was reading 135 ohms when full when it should have been 90 anyway.

 Tomorrow the fuel lines go in and it will be time for the getting the body ready for white epoxy primer before I marry the subframe to the body with solid bushings and inter frame connectors. Following that, it will time for working on the engine pending compression test results. I sure hope it won't need a full rebuilt.  Thanks to Geno on his suggestions and help with the engine build ideas.  More on that to come.
Here are some before and after pics for ya.   ENJOY!  ;D


« Last Edit: May 06, 2013, 11:42:27 PM by TurdPolisher »
If you are going to do it wrong........you might as well do it RIGHT!

Offline TurdPolisher

  • Member
  • **
  • Posts: 160
  • Bucket List # 3 under way
Re: "Piper's" Restoration Progress
« Reply #48 on: March 20, 2013, 01:59:05 AM »
repost OOPS
« Last Edit: March 20, 2013, 02:01:12 AM by TurdPolisher »
If you are going to do it wrong........you might as well do it RIGHT!

Offline NWW-79 T/A

  • Adv. Member
  • ****
  • Posts: 1882
  • 16 Year Old T/A Owner
Re: "Piper's" Restoration Progress
« Reply #49 on: March 21, 2013, 03:18:56 AM »
Looks clean! Bet that was hard work.
Romney/Ryan 2012

-1979 Solar Gold Trans Am in Restoration-

Offline Greenbird76

  • Sr. Member
  • ***
  • Posts: 763
  • The way Grandma wishes she could of ordered it!!
Re: "Piper's" Restoration Progress
« Reply #50 on: March 21, 2013, 09:22:46 AM »
 Very nice work Dude!  And I know how it is when your doing it without a rotisserie.   A lot of hard work!

Offline TurdPolisher

  • Member
  • **
  • Posts: 160
  • Bucket List # 3 under way
Re: "Piper's" Restoration Progress
« Reply #51 on: March 31, 2013, 02:24:15 PM »
Very nice work Dude!  And I know how it is when your doing it without a rotisserie.   A lot of hard work!

Thanks man!!!!!!1 Yeah man. you are telling me!  But, the hard and dirty part is over and finally I can move on and get my garage cleaned up for the next wave of dirt.............from the hours of sanding getting all the panels laser straight and ready for paint all while I work to save money for the engine rebuild.

Next step.........marry the subframe to the body along with interframe connectors...........then Epoxy primer all panels to ready it for body work and Slick Sand.  ;D
If you are going to do it wrong........you might as well do it RIGHT!

Offline TurdPolisher

  • Member
  • **
  • Posts: 160
  • Bucket List # 3 under way
Re: "Piper's" Restoration Progress
« Reply #52 on: March 31, 2013, 02:31:17 PM »
Looks clean! Bet that was hard work.

Thanks little man!  There are some spots I couldn't get all the way clean but for the most part I would give it a 9 out of 10. Well, I wouldn't call it hard work........more like a pain in the butt being 6'3 220 lbs on my back with the car only 7 inches above my head.  Dirt and grease went everywhere......... I think I am still getting dirt out of my hair.  lol  But.........the hard and dirty part is DONE!

Now to move on to the engine and bodywork......SPI epoxy primer in white is ready to go on followed by my filler and a few coats of slick sand to get her laser straight.  But first....time to marry the subframe to the body.........along with interframe connectors.  8)
If you are going to do it wrong........you might as well do it RIGHT!

Offline Jaysen

  • Jr. Member
  • *
  • Posts: 86
Re: "Piper's" Restoration Progress
« Reply #53 on: April 28, 2013, 08:19:28 PM »
Do you think you'll be able to stay within your original budget?  You seem to have a lot of tools, already.  A large part of my resto budget was eaten up bying tools.

Offline francis79

  • Jr. Member
  • *
  • Posts: 78
Re: "Piper's" Restoration Progress
« Reply #54 on: May 01, 2013, 07:04:04 PM »
that will be a nice ride when you are done , how long till we see part two of your rim refinishing ? I want to start soon on mine , francis

Offline TurdPolisher

  • Member
  • **
  • Posts: 160
  • Bucket List # 3 under way
Re: "Piper's" Restoration Progress
« Reply #55 on: May 06, 2013, 08:25:51 PM »
Do you think you'll be able to stay within your original budget?  You seem to have a lot of tools, already.  A large part of my resto budget was eaten up bying tools.

Well, I think I may be able to stay up pretty well on the budget.  Mind you, this is my first restoration and there might be unforeseen things I need to pick up. However, in the end it will be a drop in the bucket in comparison to what I can ask for it when I am ready to sell it, if I do.   You are right, bit by bit I have had to buy the tools, but Craigslist and friends have been really helpful indeed.  Once you have the tools, the next project is a real money saver indeed.
If you are going to do it wrong........you might as well do it RIGHT!

Offline TurdPolisher

  • Member
  • **
  • Posts: 160
  • Bucket List # 3 under way
Re: "Piper's" Restoration Progress
« Reply #56 on: May 06, 2013, 08:31:48 PM »
that will be a nice ride when you are done , how long till we see part two of your rim refinishing ? I want to start soon on mine , francis

I'm not sure where I left off with the video.  I will have to check it and get another on up.  If you let me know where you are in the process, I can just type the instructions.  I think I pretty much had it covered, but it has been a while since I have checked the video.

I can say the most important part of the the wheel restoration is getting ALL of the spokes well sanded and feathered.  And, although the chap stick works well, taping it is the way to go.  Just I have 9 hours total in EACH wheel.  Sure would be nice to not have to do it by hand.  Also, don't clear coat the aluminum part as it will be polished and the clear coat won't stick very well.  Just keep it all taped up and shoot three coats of clear over the paint.  Eagle aluminum spray cleaner will keep the aluminum shiny. Just use a soft cloth when you whip them as aluminum is very soft  ;D

« Last Edit: May 06, 2013, 10:40:13 PM by TurdPolisher »
If you are going to do it wrong........you might as well do it RIGHT!

Offline TurdPolisher

  • Member
  • **
  • Posts: 160
  • Bucket List # 3 under way
Re: "Piper's" Restoration Progress
« Reply #57 on: May 06, 2013, 09:43:04 PM »
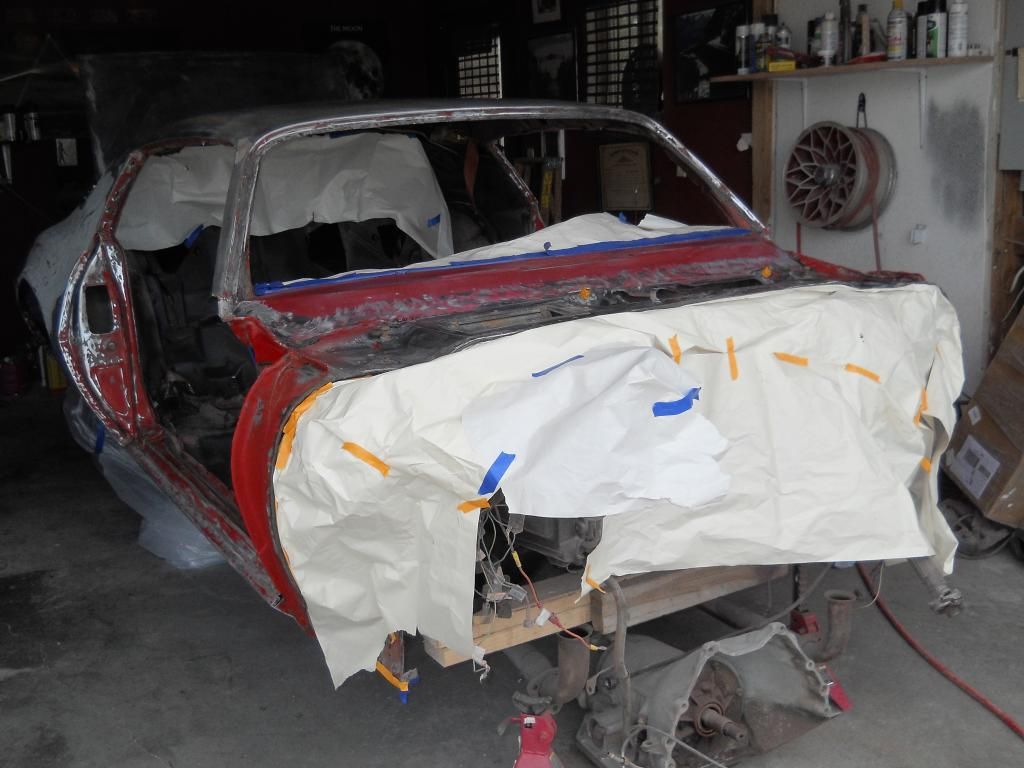
Well it has been a while since my last post so I thought I would bring you all a little update on Piper's progress.

In the winter I had to car sanded with 80 grit DA and de-greased with wax and grease remover then applied the PPG Shopline Epoxy.  I liked it, but it is a PITA to sand, so, I went back to my original plans of using SPI Epoxy Primer.  It sands easily with no need for guide coat do to the sheen, has a 7 day work window, and sticks like flies on fly paper. It is a 1:1 mix ratio and a gallon of both epoxy and activator is plenty for the entire car.  Reduced with the base coat reducer, it will flow out like glass for a perfect seal coat prior to Base coat.  It is VERY cost effective and the forums of high end restorations rave about it.......and now I know why.  The white with the Mayan red will really make the color POP. I decided to get the body work done before I mounted the subframe to keep the over spray off and more important, protect the exposed metal.

80 grit DA followed by wax and grease remover.  CLEAN CLEAN CLEAN and make sure if flashes off for 45 min.


After that tack rag then apply 2 coats of white SPI Epoxy was shot with a 1.4 tip over the prepped surface in accordance to the Tech sheet.


Followed by marking the areas in need of filler with a black marker.  Skim coated with Evercoat Rage filler and chased with 80 Grit DA followed by 180 grit feather edge. The jams will be shot when I flip the door over after it has cured.


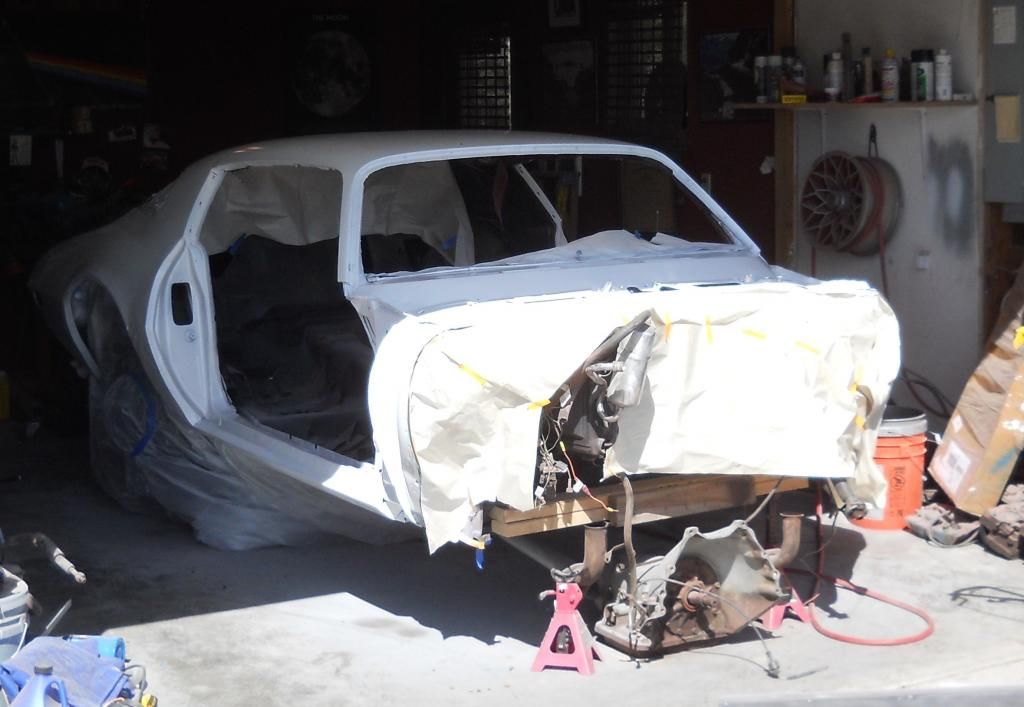
After letting sit for 5 days, I dry sanded the entire car with 180 using the sheen of the Epoxy as a guide coat. De-greased and let sit for 45 min prior to applying 2 more coats of epoxy to cover the bare metal and for corrosion protection.


Next step will be to glaze the spots that need more attention then apply 3 coats of Slick Sand with a 2.5 tip over the epoxy. Then sand with 120-180 guide coated then 2 more coats depending on how it looks. I will then finish with 400 before I spray the reduced epoxy as a sealer.  The added 2 coats of epoxy will also seal in the body filler and it will cure rock hard with both  mechanical and chemical adhesion.  DO NOT USE EVERCOAT SUPER BUILD 4:! OVER EPOXY.....thank God for research on this as I had that stuff and learned it has adhesion problems.......not to mention is hard to sand.

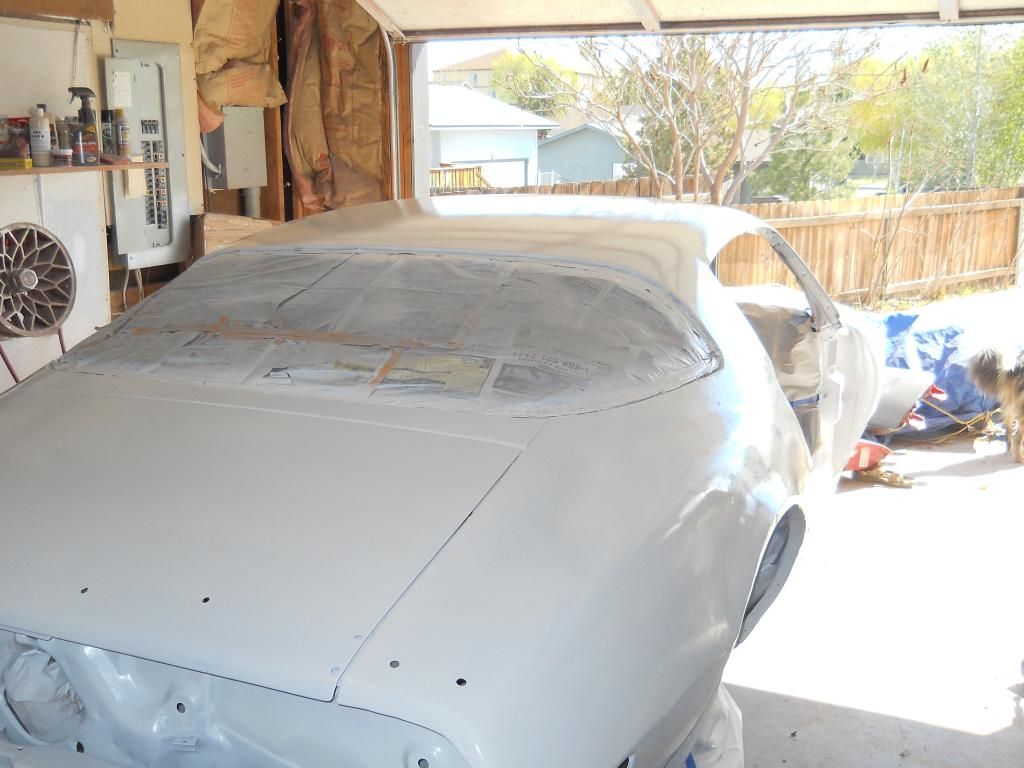
So far so good, she is coming along nicely and sure does look better in the white. Soon the sub frame, core support with new bushings, fenders and restored wheels will be  mounted up getting it ready to ensure the body lines and door gaps line up correctly. Taping the lines off will ensure the lines are spot on when it comes time for the Super Build.

I can't wait to have a rolling chassis again.  8)

« Last Edit: May 07, 2013, 12:22:28 AM by TurdPolisher »
If you are going to do it wrong........you might as well do it RIGHT!

Offline NWW-79 T/A

  • Adv. Member
  • ****
  • Posts: 1882
  • 16 Year Old T/A Owner
Re: "Piper's" Restoration Progress
« Reply #58 on: May 06, 2013, 10:25:21 PM »
Looks great man
Romney/Ryan 2012

-1979 Solar Gold Trans Am in Restoration-

Offline TurdPolisher

  • Member
  • **
  • Posts: 160
  • Bucket List # 3 under way
Re: "Piper's" Restoration Progress
« Reply #59 on: May 06, 2013, 10:29:58 PM »
Looks great man

Thanks little buddy, bit by bit she is coming along............yet I have so far to go.  Heck, I want to drive it!!  Soon, the motor will be next.
If you are going to do it wrong........you might as well do it RIGHT!