I decided to attempt to fix my clock and actually did it so I decided to post what I did here and maybe I can save some of you the money that it costs to send yours out to have it done. Its actually more work getting the clock out and putting it back in than getting it going.
The clock is actually about 95% mechanical and 5% electric and believe it or not the problem is most likely in the electric.
1. Remove your under column trim piece and your dash bezel.
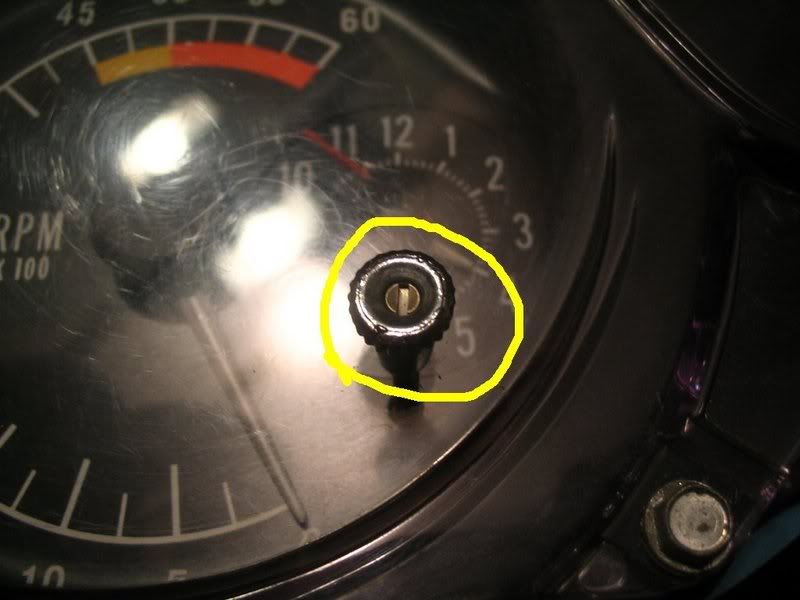
2. Hold the knob that you set the time with with one hand and using a very small screwdriver remove the screw from the knob and remove the knob.
3. Remove the screws holding in the speedo guage cluster, pull the cluster out and disconnect the tach wires, speedo wires, and speedo cable etc and gently remove the guage cluster.
4. Remove the plastic face from the cluster and the black trim piece.
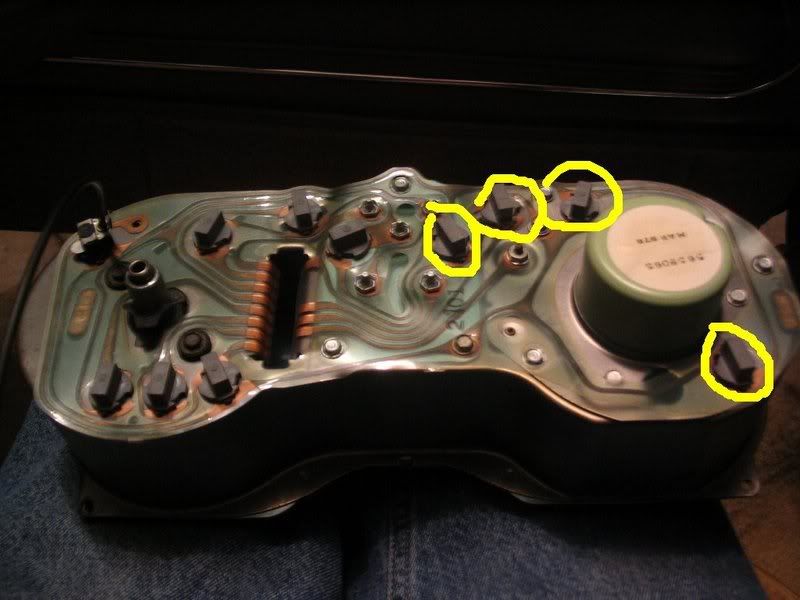
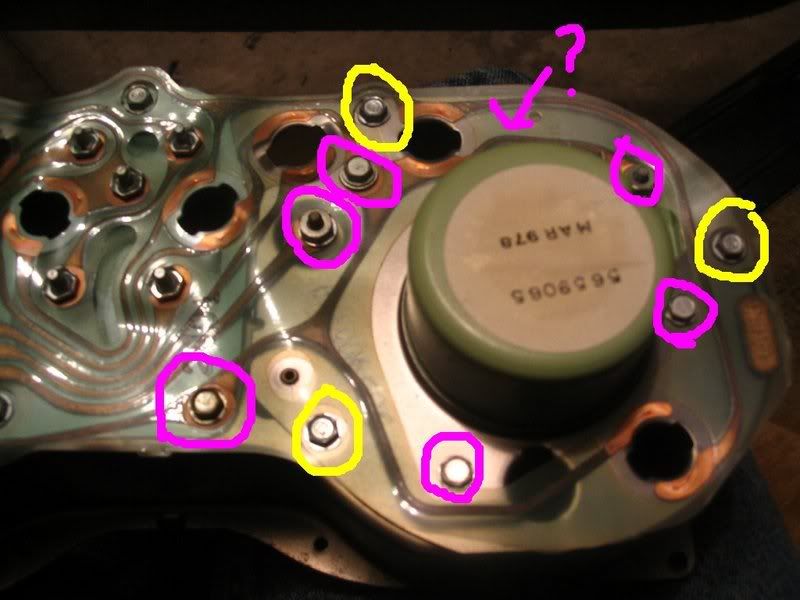
5. Remove the Lights from the backside of the cluster. I only took the stuff off of the tach side of the cluster but if you didn't want to chance damaging your printed circuit you could remove all of the lights and screws and take the circuit out.
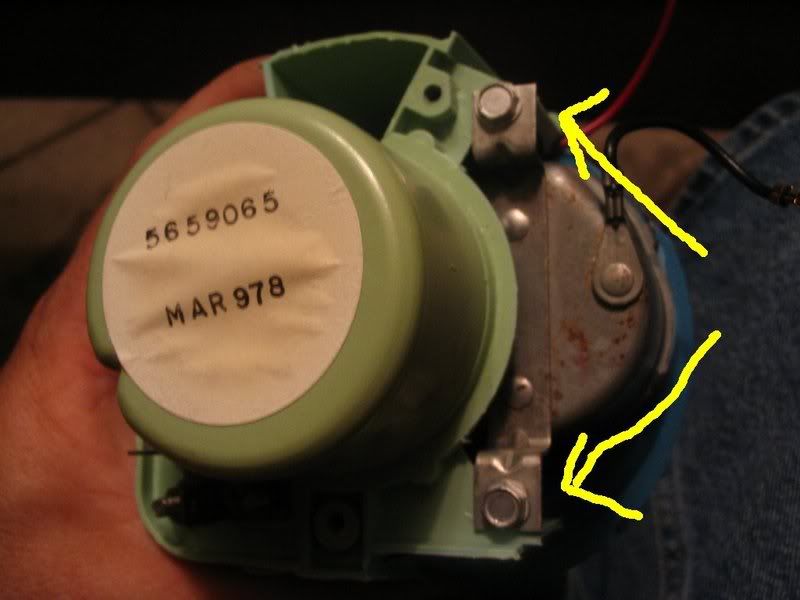
6. Remove the screws and 2 nuts circled in purple. Then the yellow ones. The 3 circled in yellow are the 3 main ones holding in the tach.
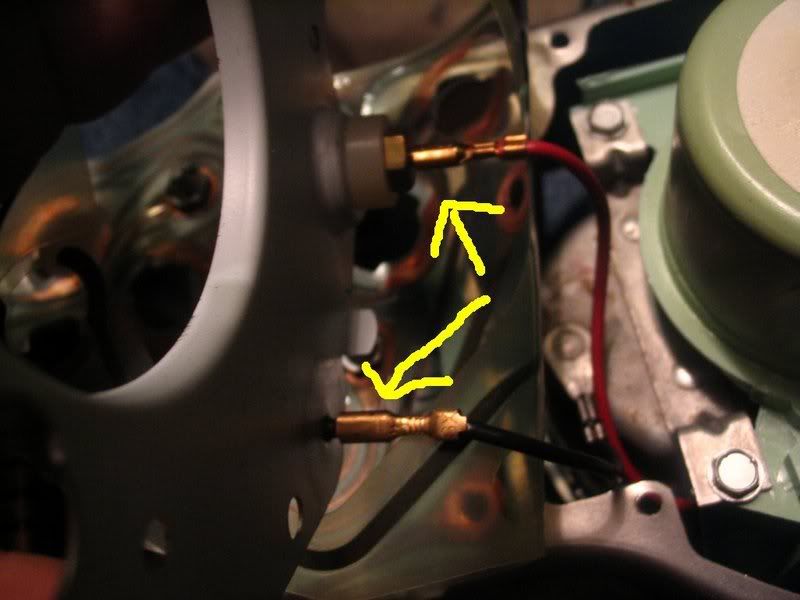
7. Gently lift up on the printed circuit and pull the tach patially out. It will not come out from the backside, you just need to lift it out far enough to disconnect the red and black wires for the clock.
8. After wires are disconnected gently lower tach back into cluster, turn cluster over and remove the tach from the front.
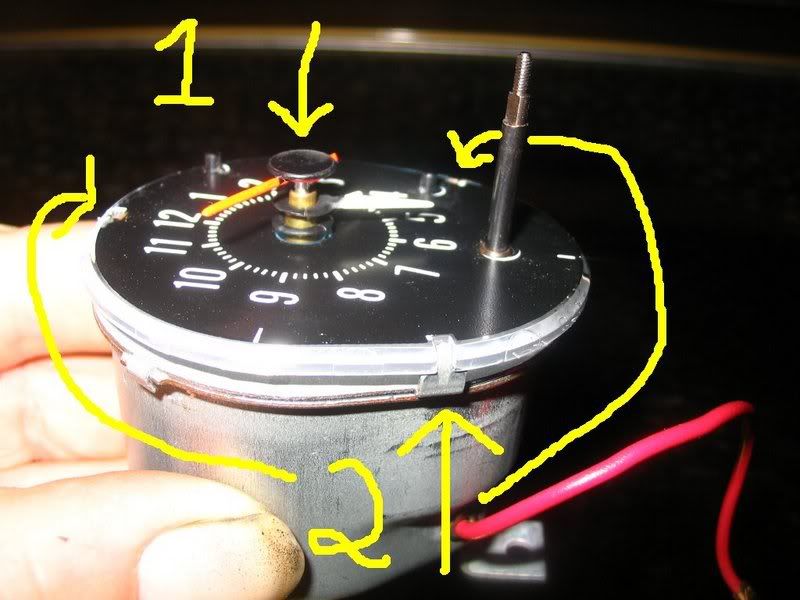
9. When the tach is out turn it over and remove the 2 screws holding in the clock.
10. Once the clock is out gently remove the second hand by pulling straight out. I recommend using your fingernails if you can. The paint on the face of the second hand is very delicate. I pulled a little of the paint off using needlenose pliers and ended up having to repaint the face when I put it back together. Once the second hand is off you can use needlenoses to pull off the minute then hour hand by pulling straight back. Once the needles are off use a small screw driver to slightly bend out the 3 tabs holding the clock face on. Only bend them just enough to remove the clock face.
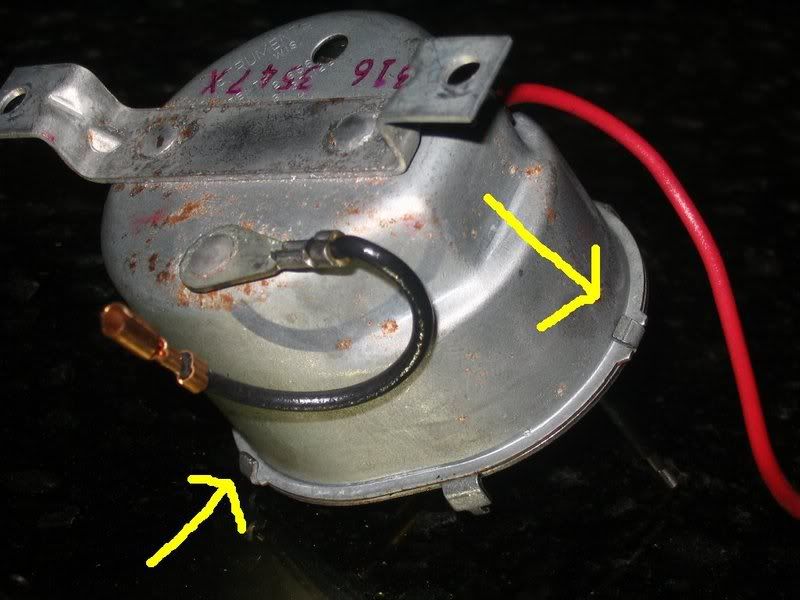
11. Once the clock face is off turn the unit over and again gently bend out the 3 tabs enough to seperate the clock housing.
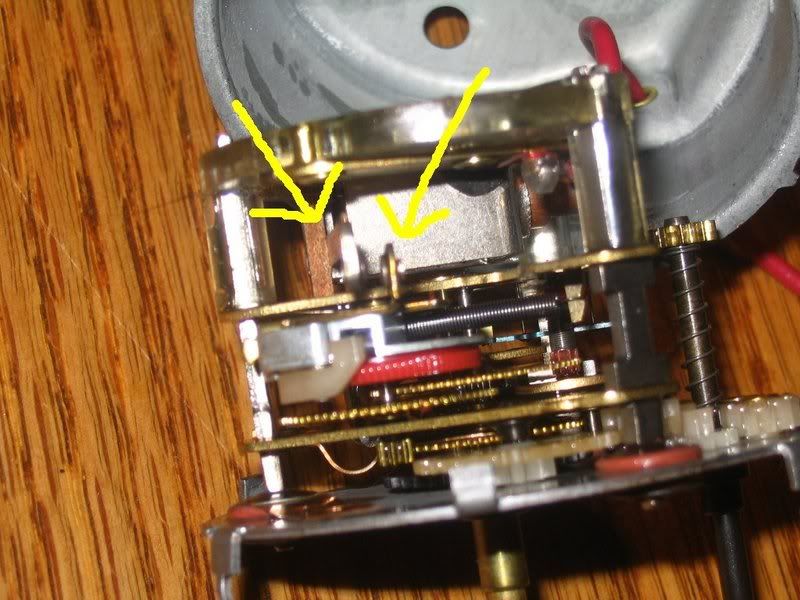
12. Once the unit is apart you can do quite a few things. First drop a little 3 n 1 oil on the gears. Then you can test to see if the clock functions mechanically. Do this by using your finger to move the contact indicated by the right arrow all the way to the right. This will load the spring and if the unit is mechanically ok your clock will start to work !!. If your clock is mechanically ok take a little fine grit sandpaper or something similar to clean the contacts up ( indicated by the two yellow arrows). This is all you really need to do. You can test the unit by hooking it up to your battery using jumper wires ( Black wire to the body, red to positive cable). Once the unit has power to it what will happen is when the spring tension pulls the 2 contacts together and electrical charge will throw the right contact all the way to the right and the spring takes over again.
13. Reassembly is basically everything you did in reverse. When you put the housing back together, and reinstall the face make sure you use needle noses or a screwdriver to pinch the tabs back closed tightly.
14. When you reinstall the hands set the time to 12:00 exactly. Just makes sure your hands will point to the right time when you put it all back together.
And thats about it. If I think of any steps I missed or other helpful tips I will make sure I add them. If anyone has any questions just PM me. I usually check the forum at least once a day. every other at the most.


