I have an early '78 model that came without the Power Lock option from factory. This option as offered new I don't really understand. You simply press an electrical button to lock or unlock instead of using the door lock snipper button. I guess, if anything it relocates the lock to an easier position due to the long doors.
Anyway, I wanted to install keyless entry at a later date to save the constant risk or keys fumbling near paintwork. After looking at a few installs and chatting to a local auto electrician who suggested a specific kit he used that also came with a generic set of motors and customising the brackets and rods to suit. While they do this everyday I didn't like it on mine so sourced some original GM units for mine, a used set and a more recent NOS set.
The original power locks by AC Delco are #22020256 / 22062740 / 20432632 depending on renumbering and if they included mounting bracket or not. These were used on 1978-1992 GM vehicles. The 78-81 bracket only is #4999711. Pre-78 used a solenoid and different brackets and rods.
 GM NOS power lock mounting bracket 78_81 4999711
 by
Aus78Formula, on Flickr
I had the mounting brackets for both sets replated, along with the rods and motor screws. The used set was for testing purposes and constantly being dropped inside the doors with fish oil and window track gunk on them.
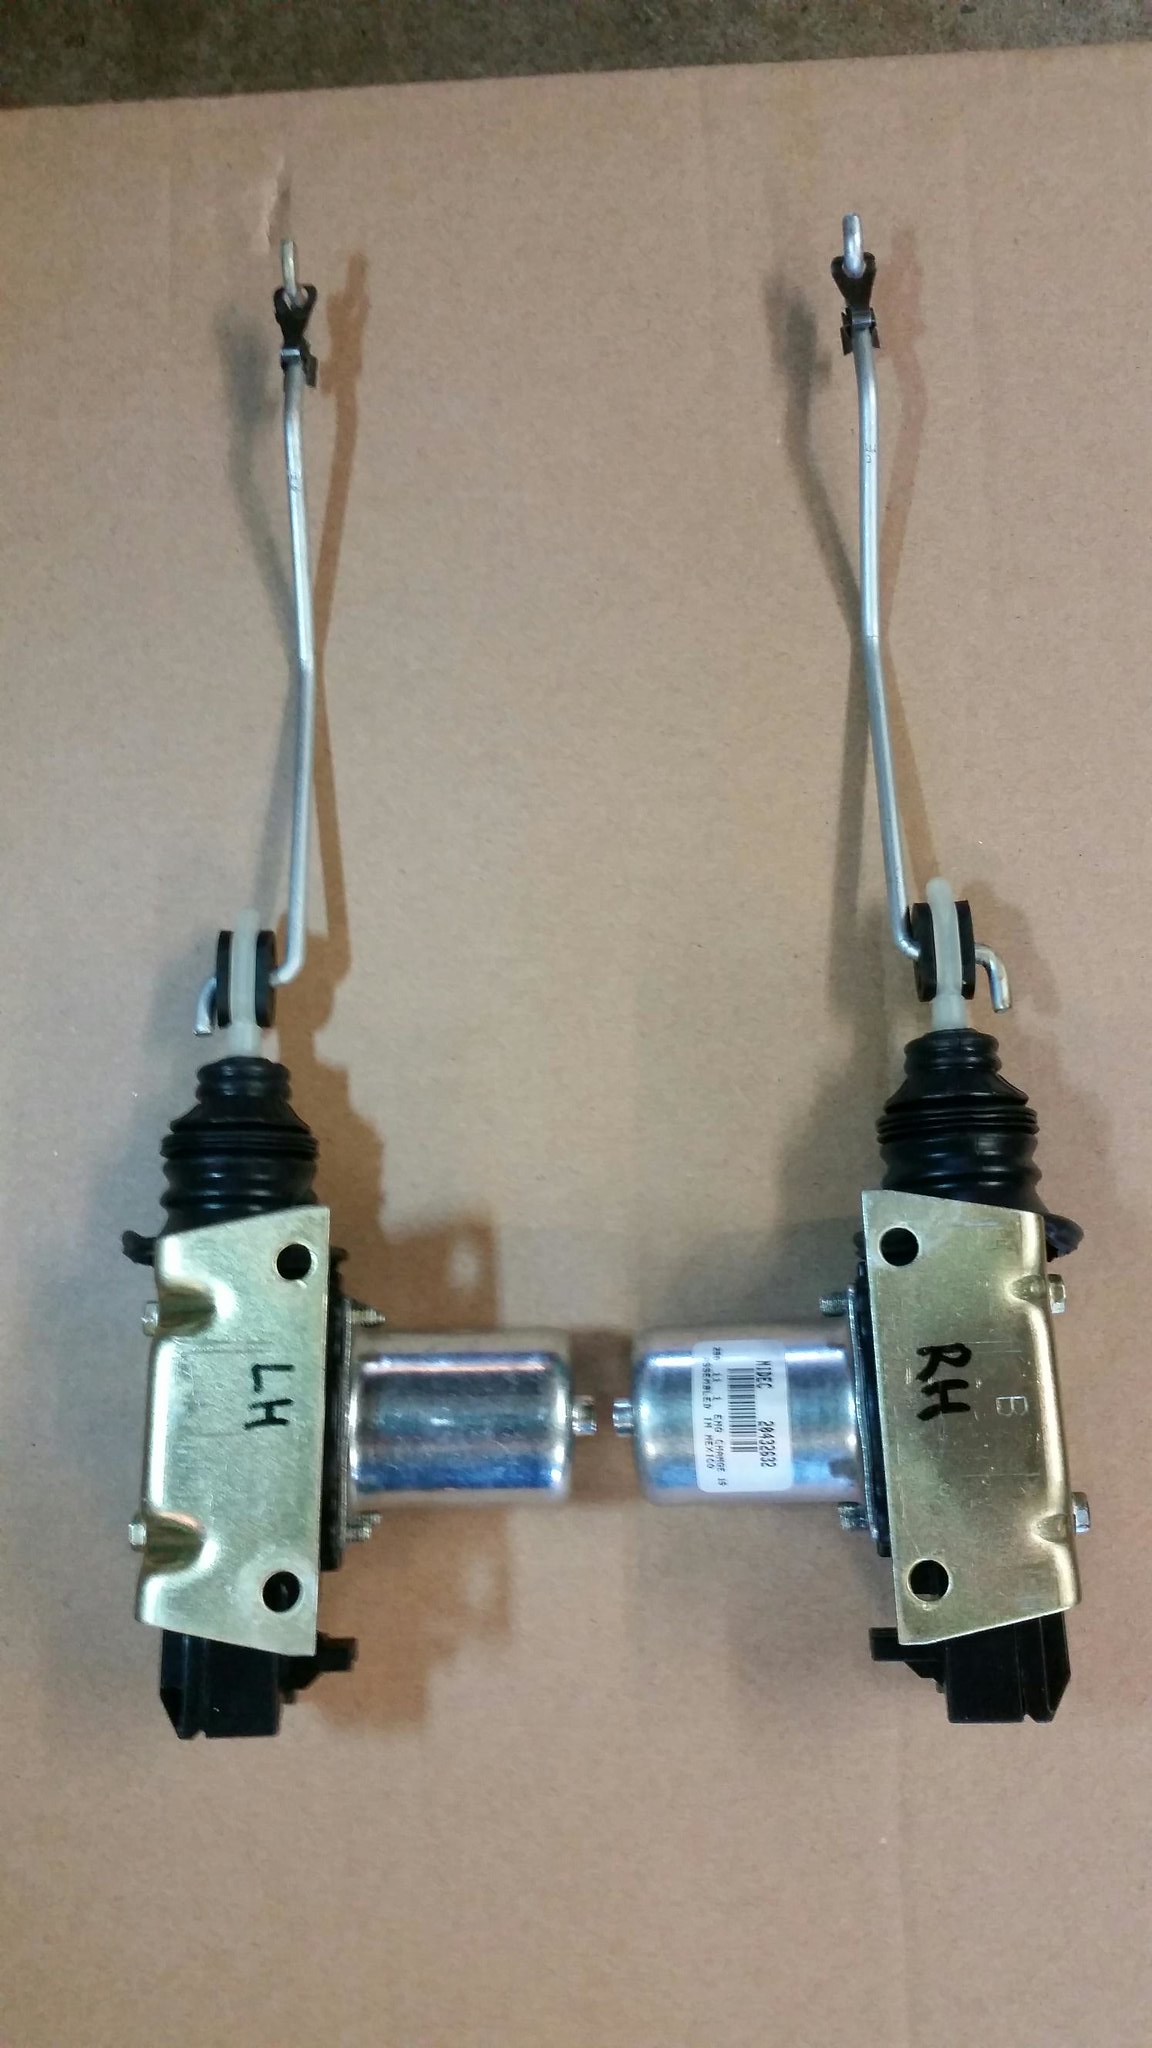
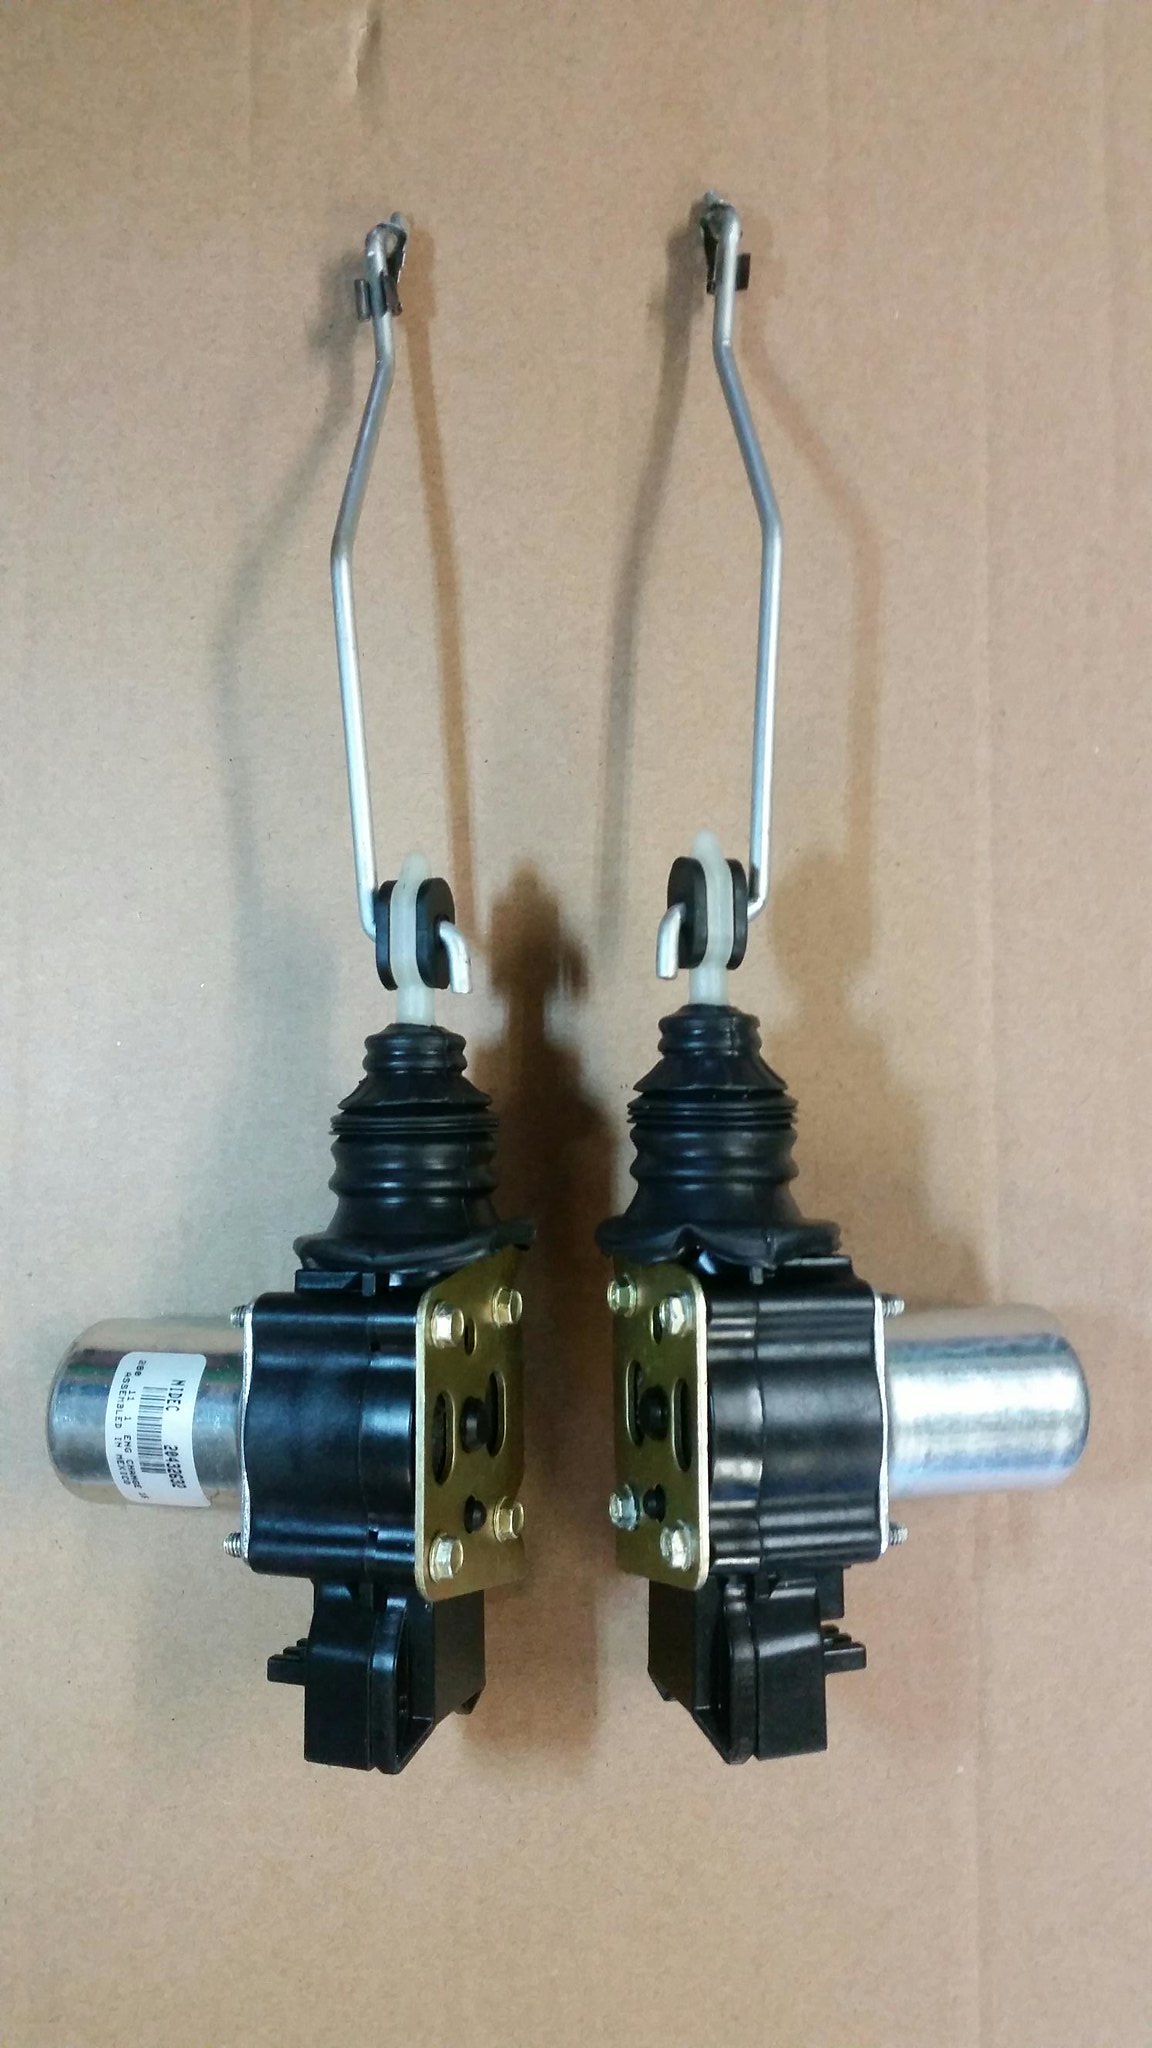
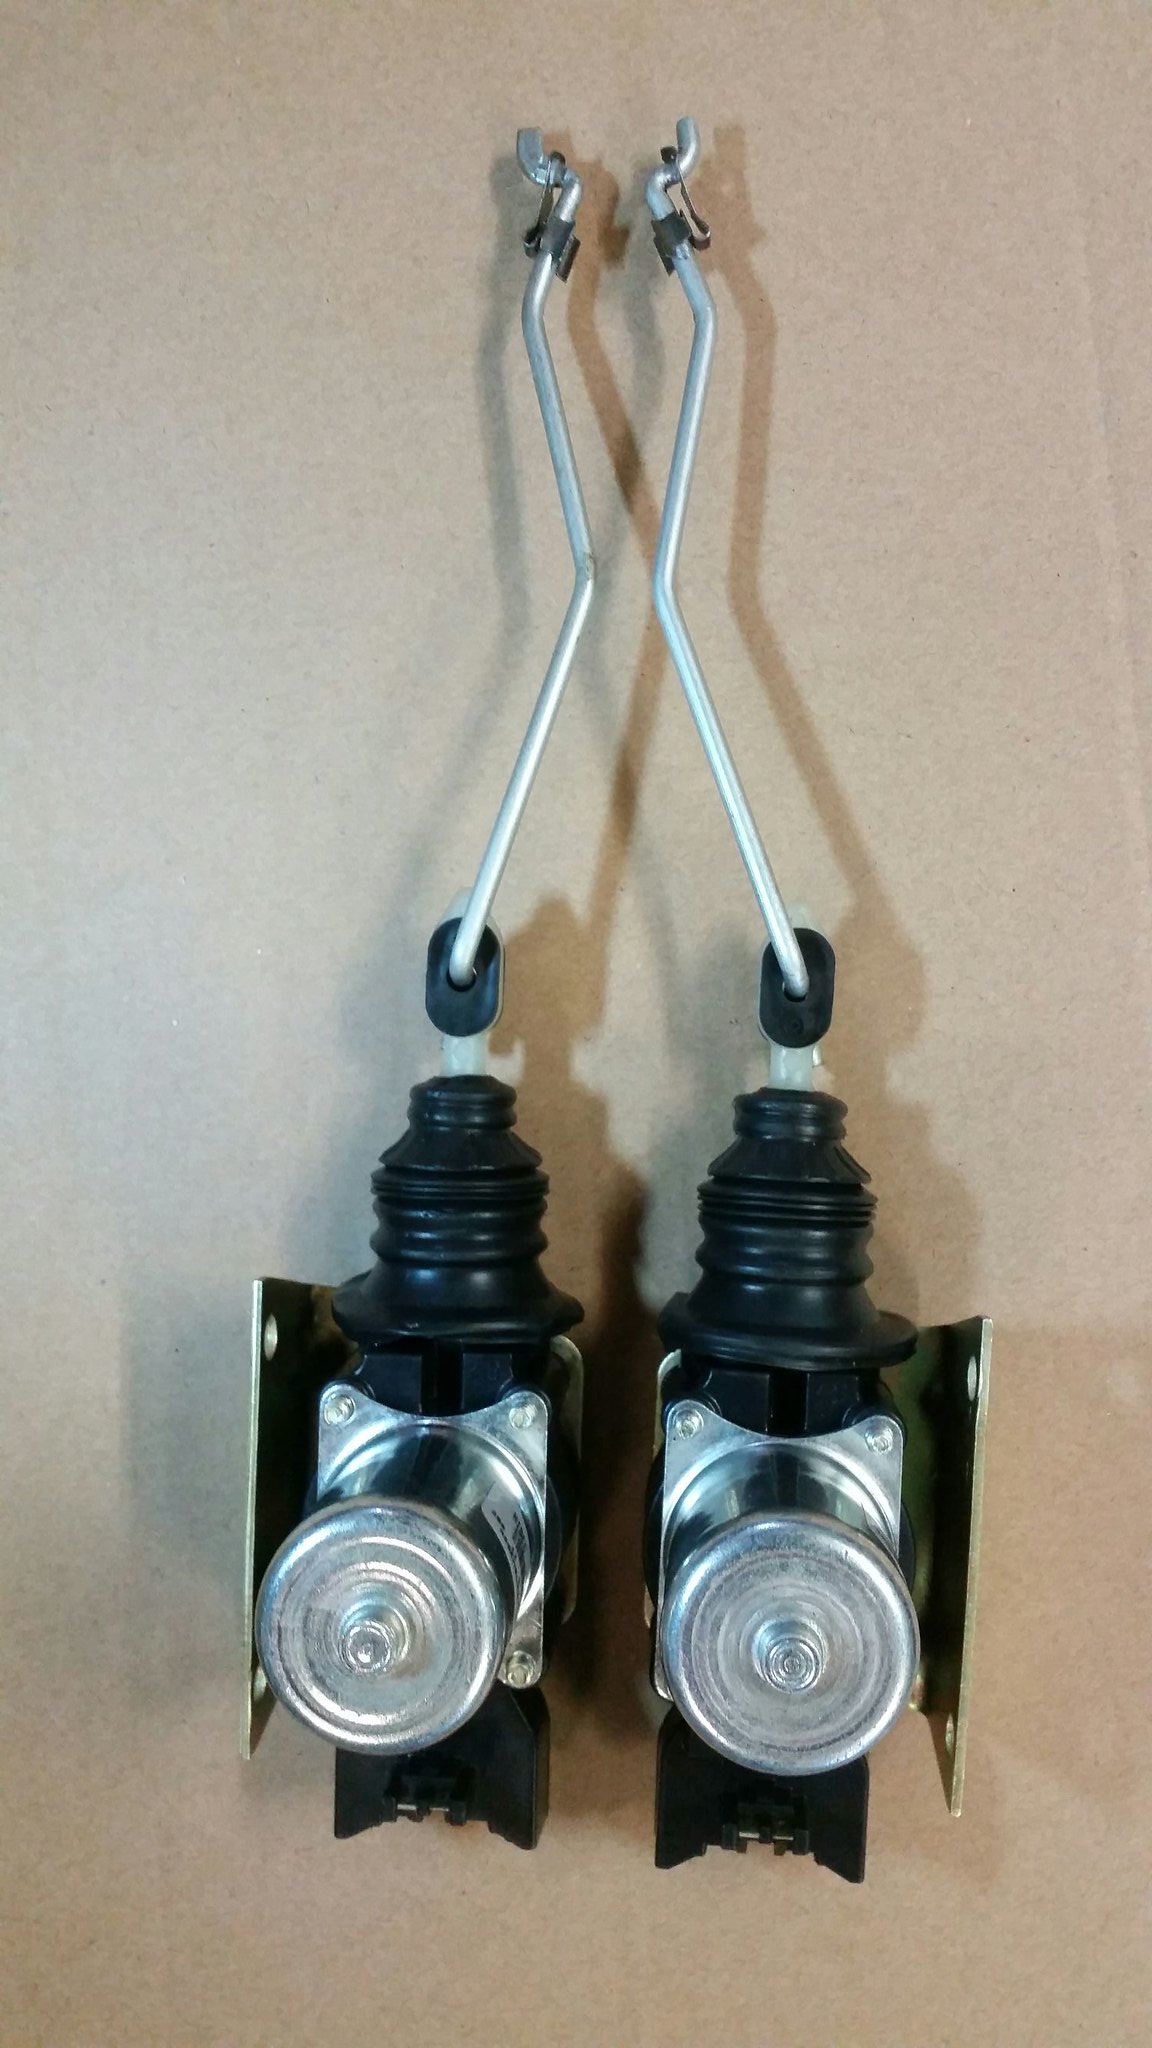
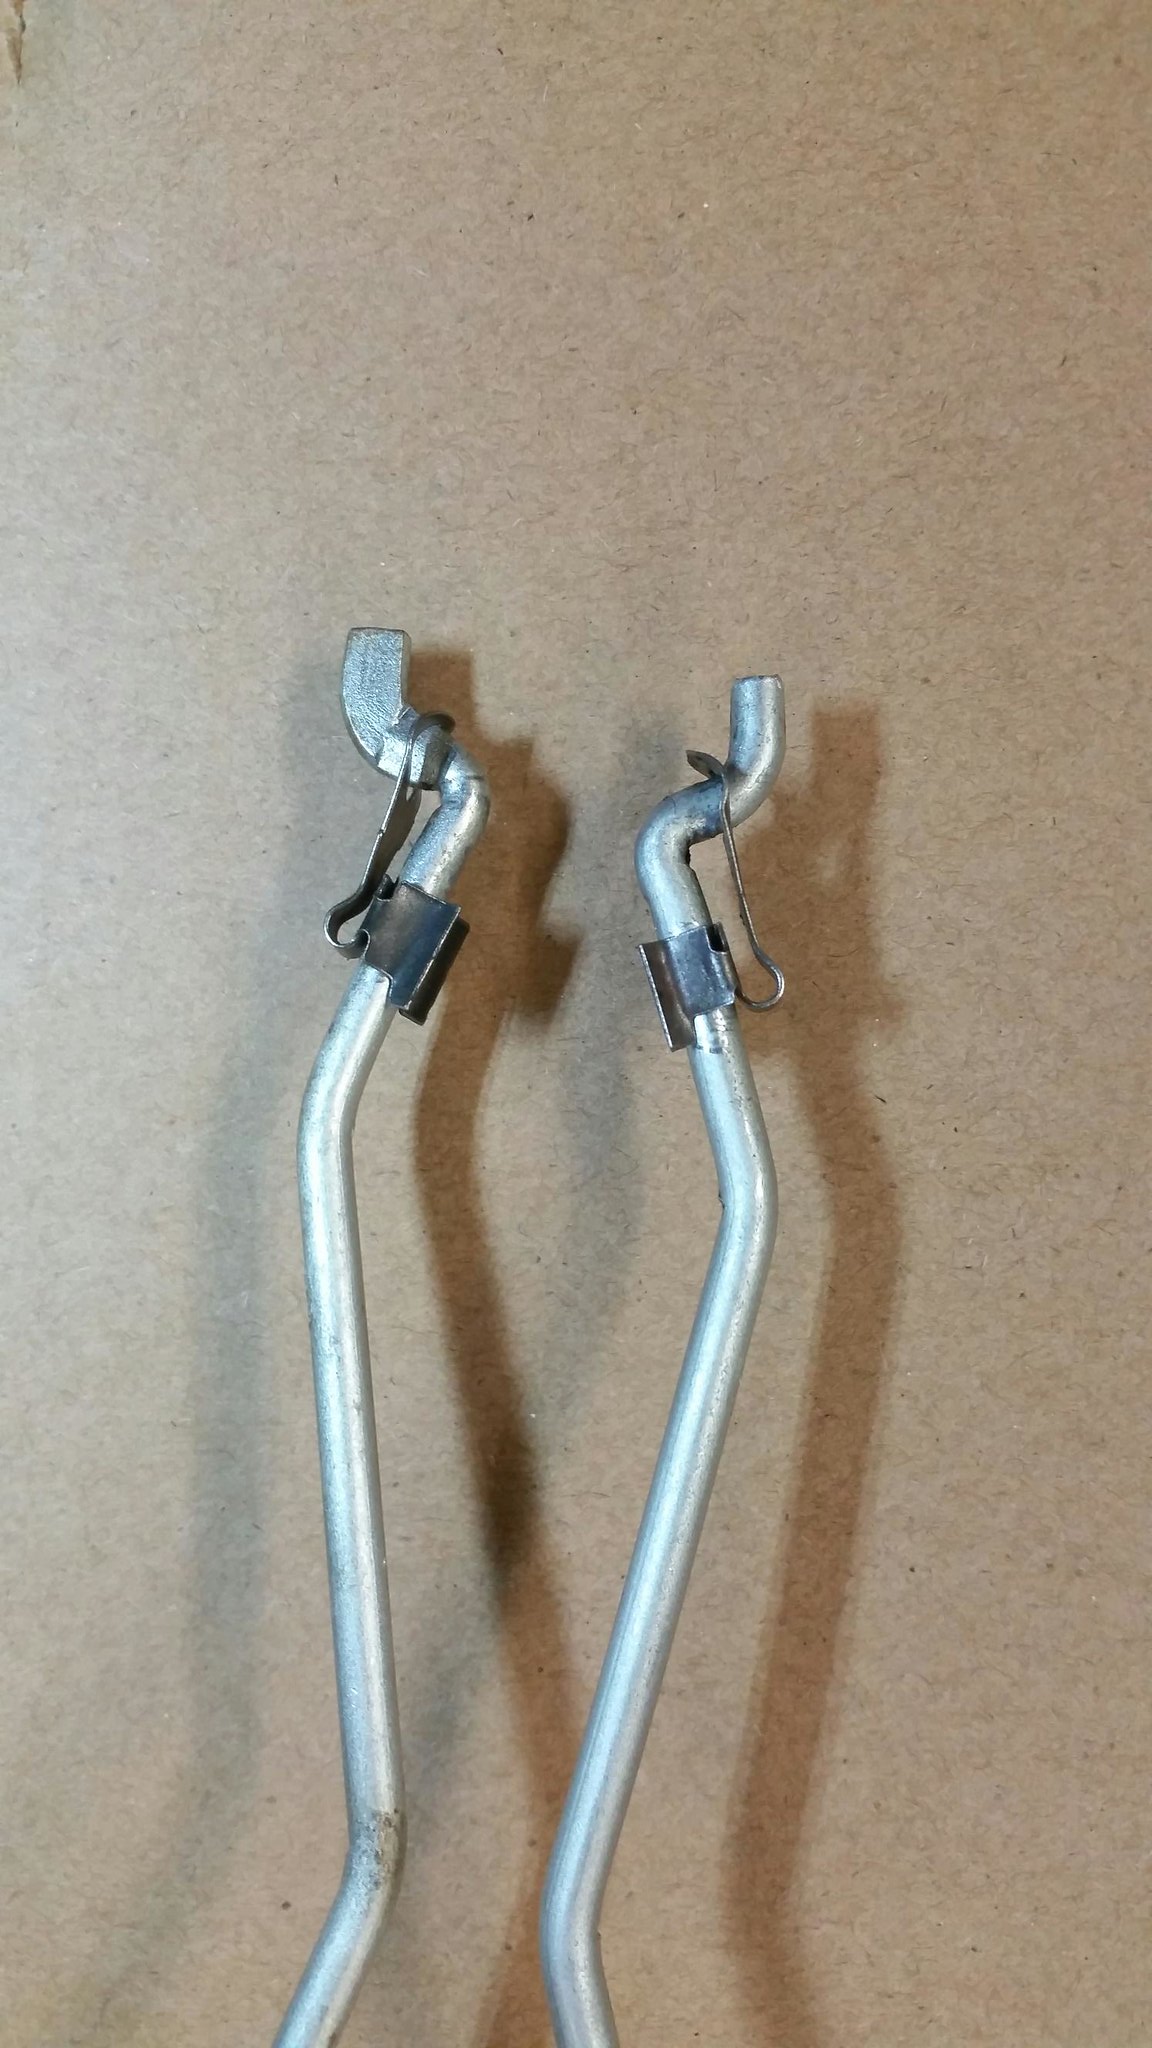
Here's the NOS GM set complete. LH and RH doors shown in each pic to record which way the bracket mounts for each. Also, the 2 locking rods are also specific in which way they go and how they install. The LH side also has the flattened top where it inserts into a slot in the door latch mechanism, the RH side uses a regular round hole to prevent confusion but still possible to 'make them fit' incorrectly.
 20180328_172005
 by
Aus78Formula, on Flickr
 20180328_172050
 by
Aus78Formula, on Flickr
 20180328_172150
 by
Aus78Formula, on Flickr
 20180328_172204
 by
Aus78Formula, on Flickr
It wasn't until I had the original used power lock set in my hand and test fitting on my doors that I realised the first problem. The doors already have dimples for where the brackets mount up using 2 rivets. I found one side lined up perfectly with the bracket, the other side had different hole spacing and were in a different location. This is when I realised my LH door is original for 78, my RH door is the earlier style for dimples. Both of my doors are original to vehicle and for 78 door trim, and have the same factory overspray under more recent resprays. So, one can only assume that perhaps existing door shells and parts were being used on vehicles not requiring this option, or just an unusual error. I could quite easily have just drilled out the dimples and discovered this later.
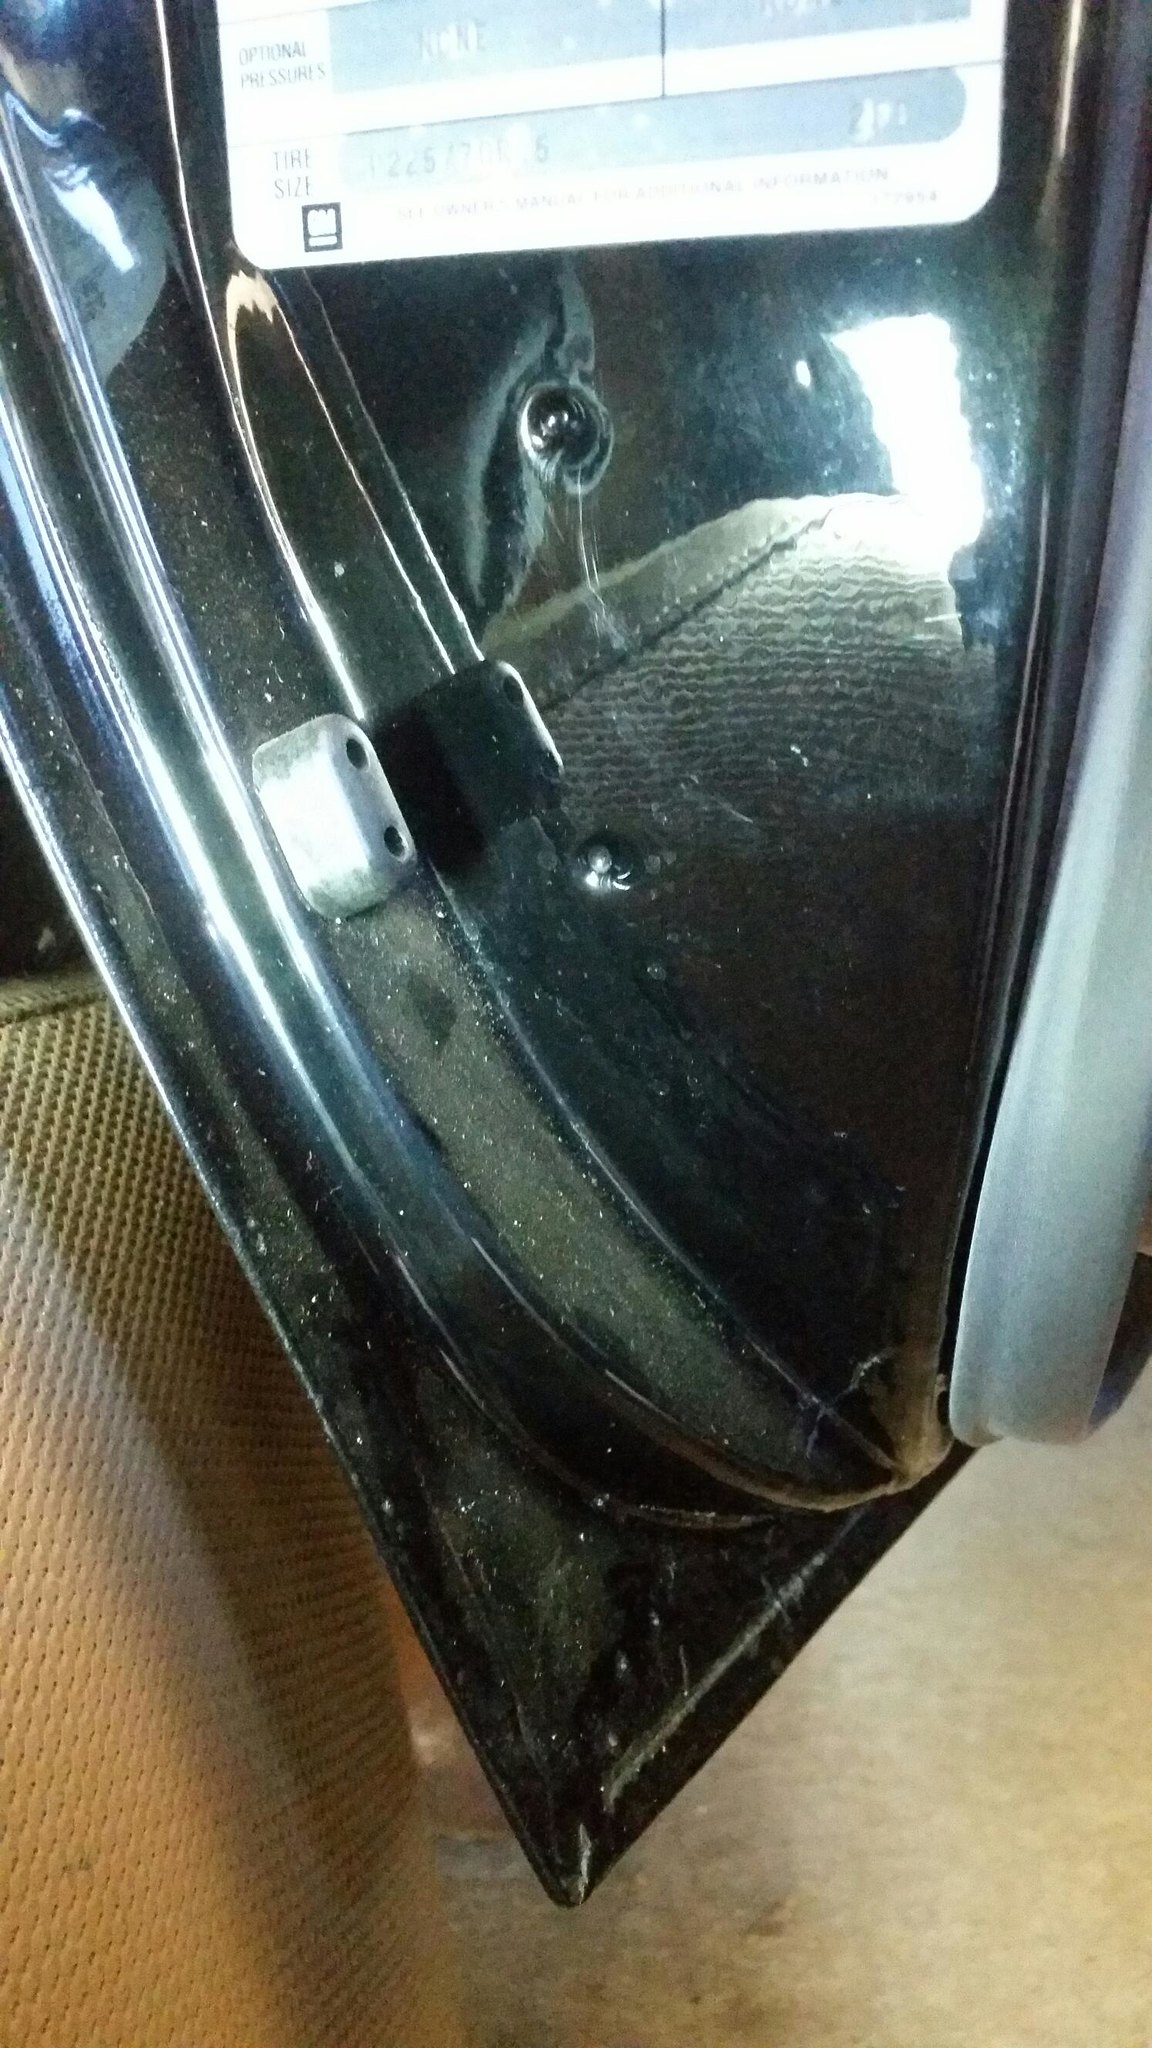
Here's the 78-81 dimple arrangement on the LH door.
 14938
14938 by
Aus78Formula, on Flickr
Factory rivets on a 78:
 78 Tire door decal power lock rivets
 by
Aus78Formula, on Flickr
I'd already decided that instead or the original factory-style rivets I wanted something that would work for both a dimpled door and a non-dimpled door. I found the 90's era GM door window regulator rivets were very strong and had a nice flat head and look like they belong there. I purchased some, but in the end went with a bolted arrangement so that the motors could still be removed easily for further work. More about this later.
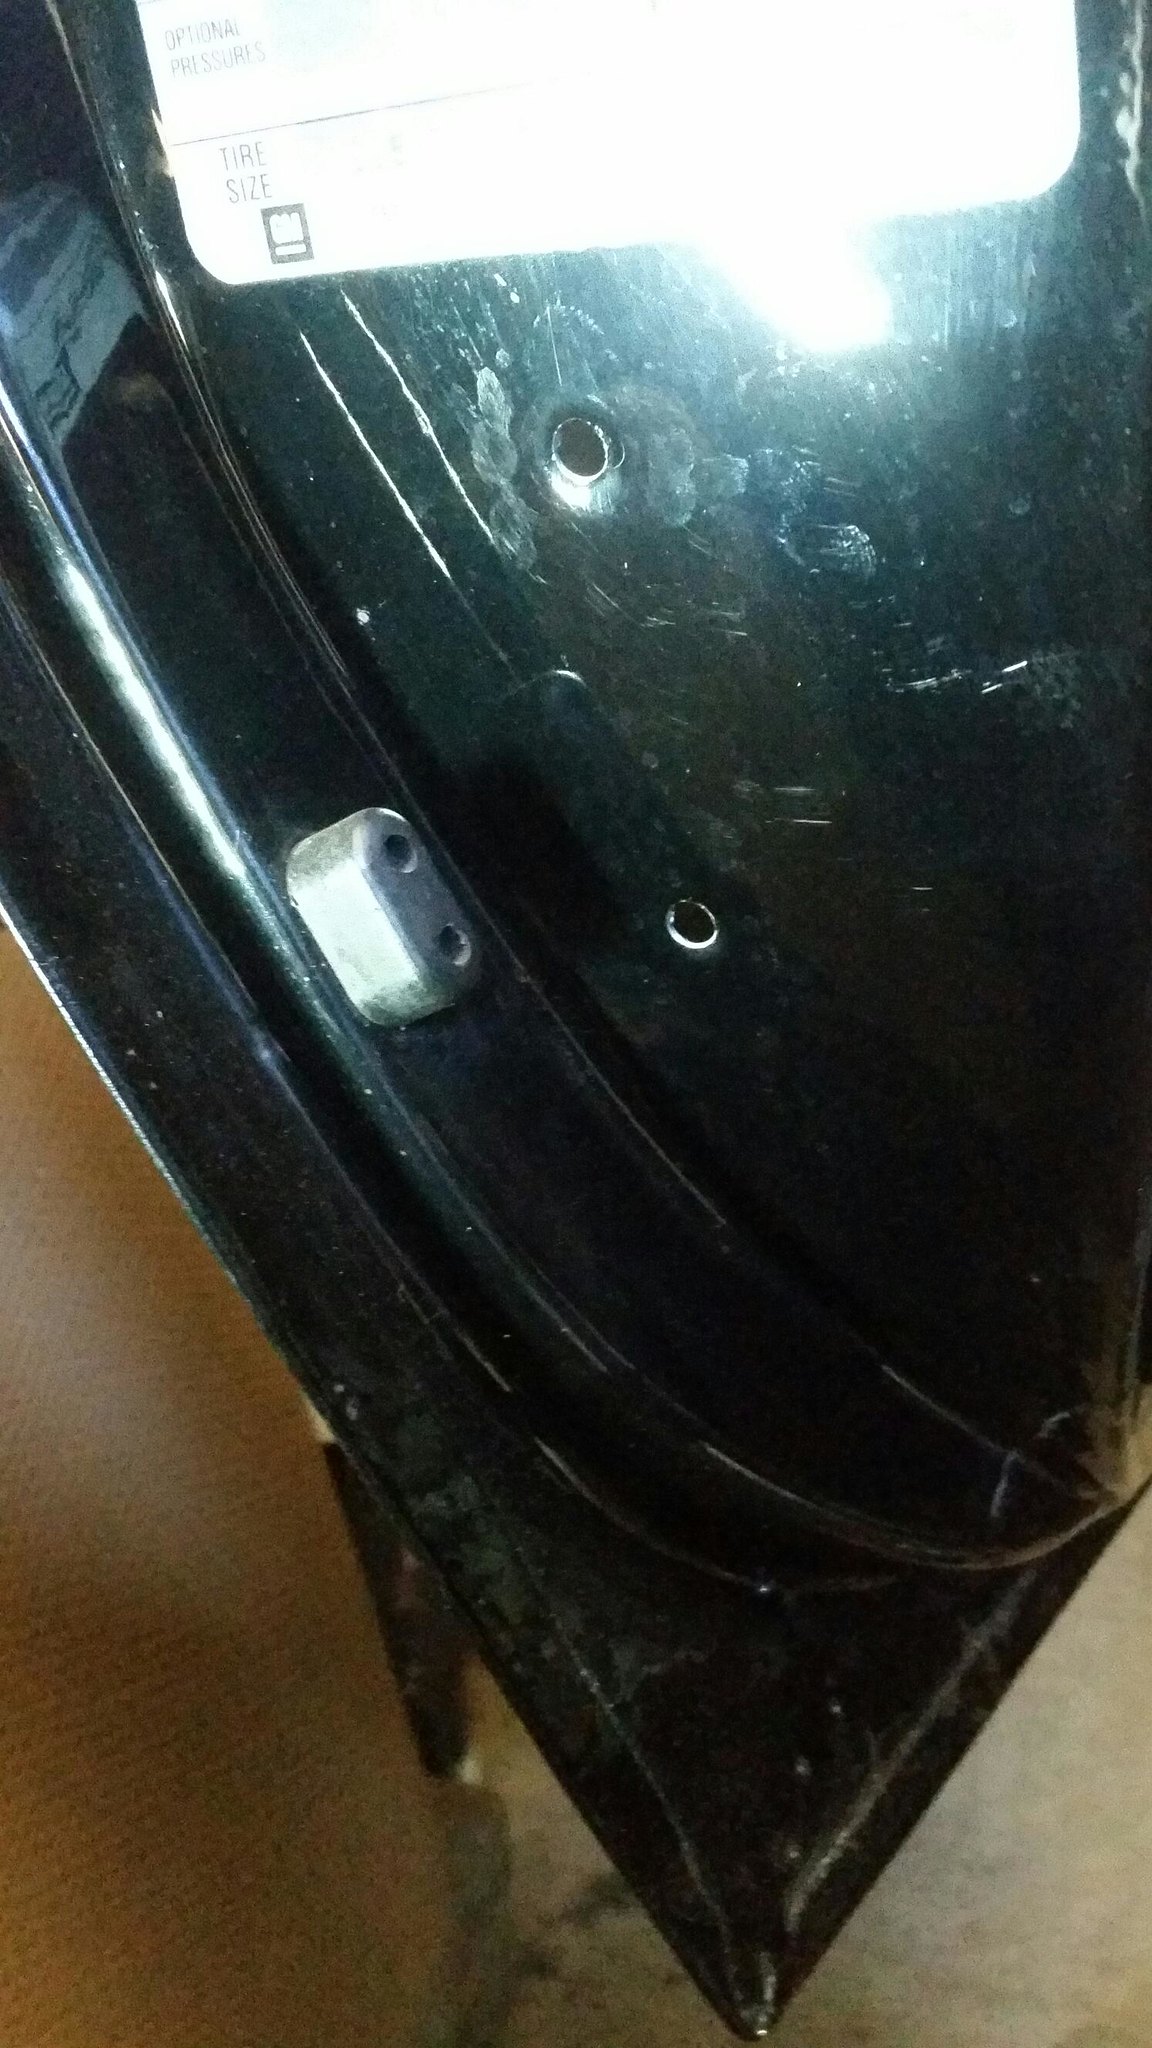
I planned to use 6mm bolts so here's the dimples drilled to 6mm clearance holes.
 14939
14939 by
Aus78Formula, on Flickr
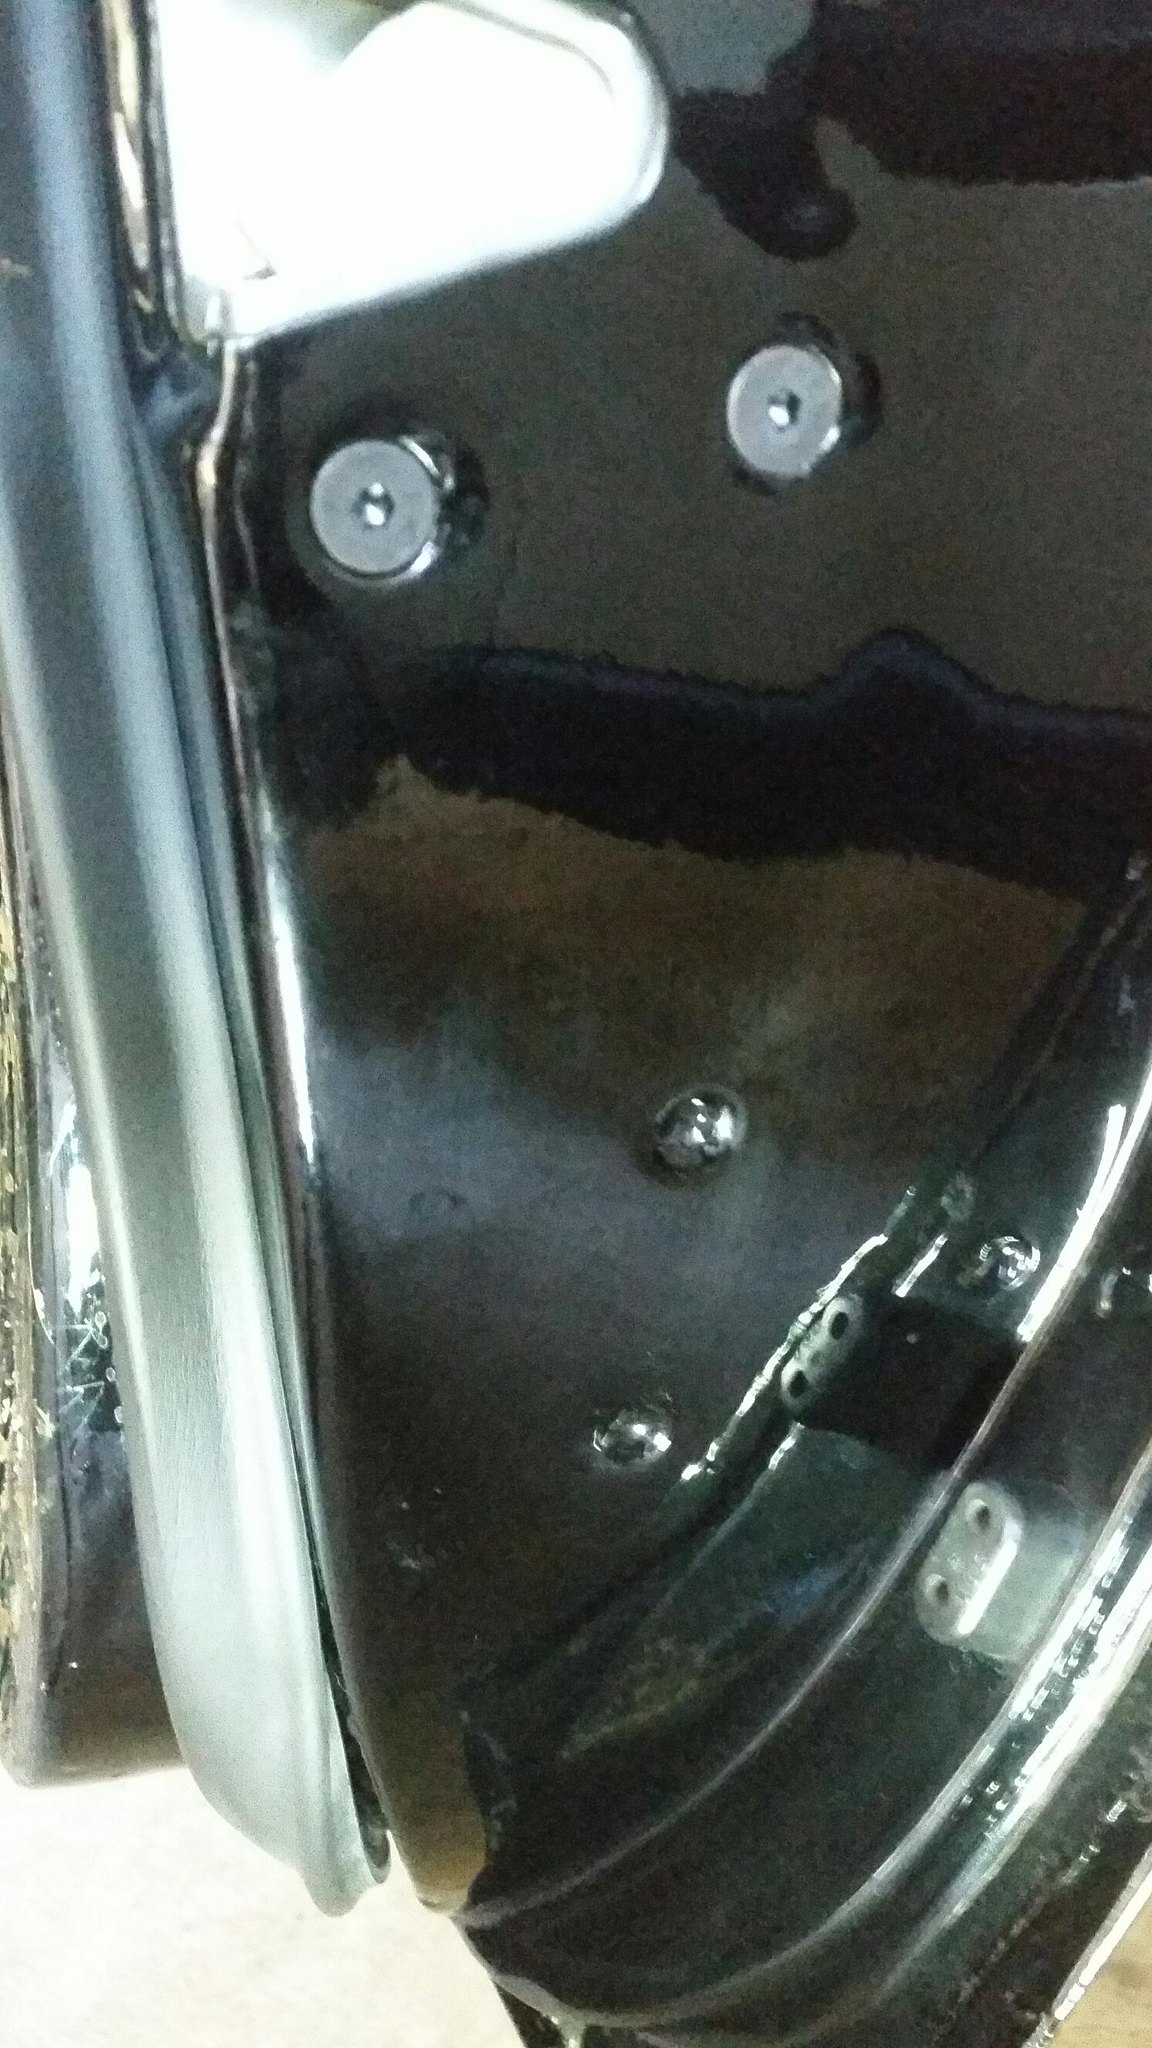
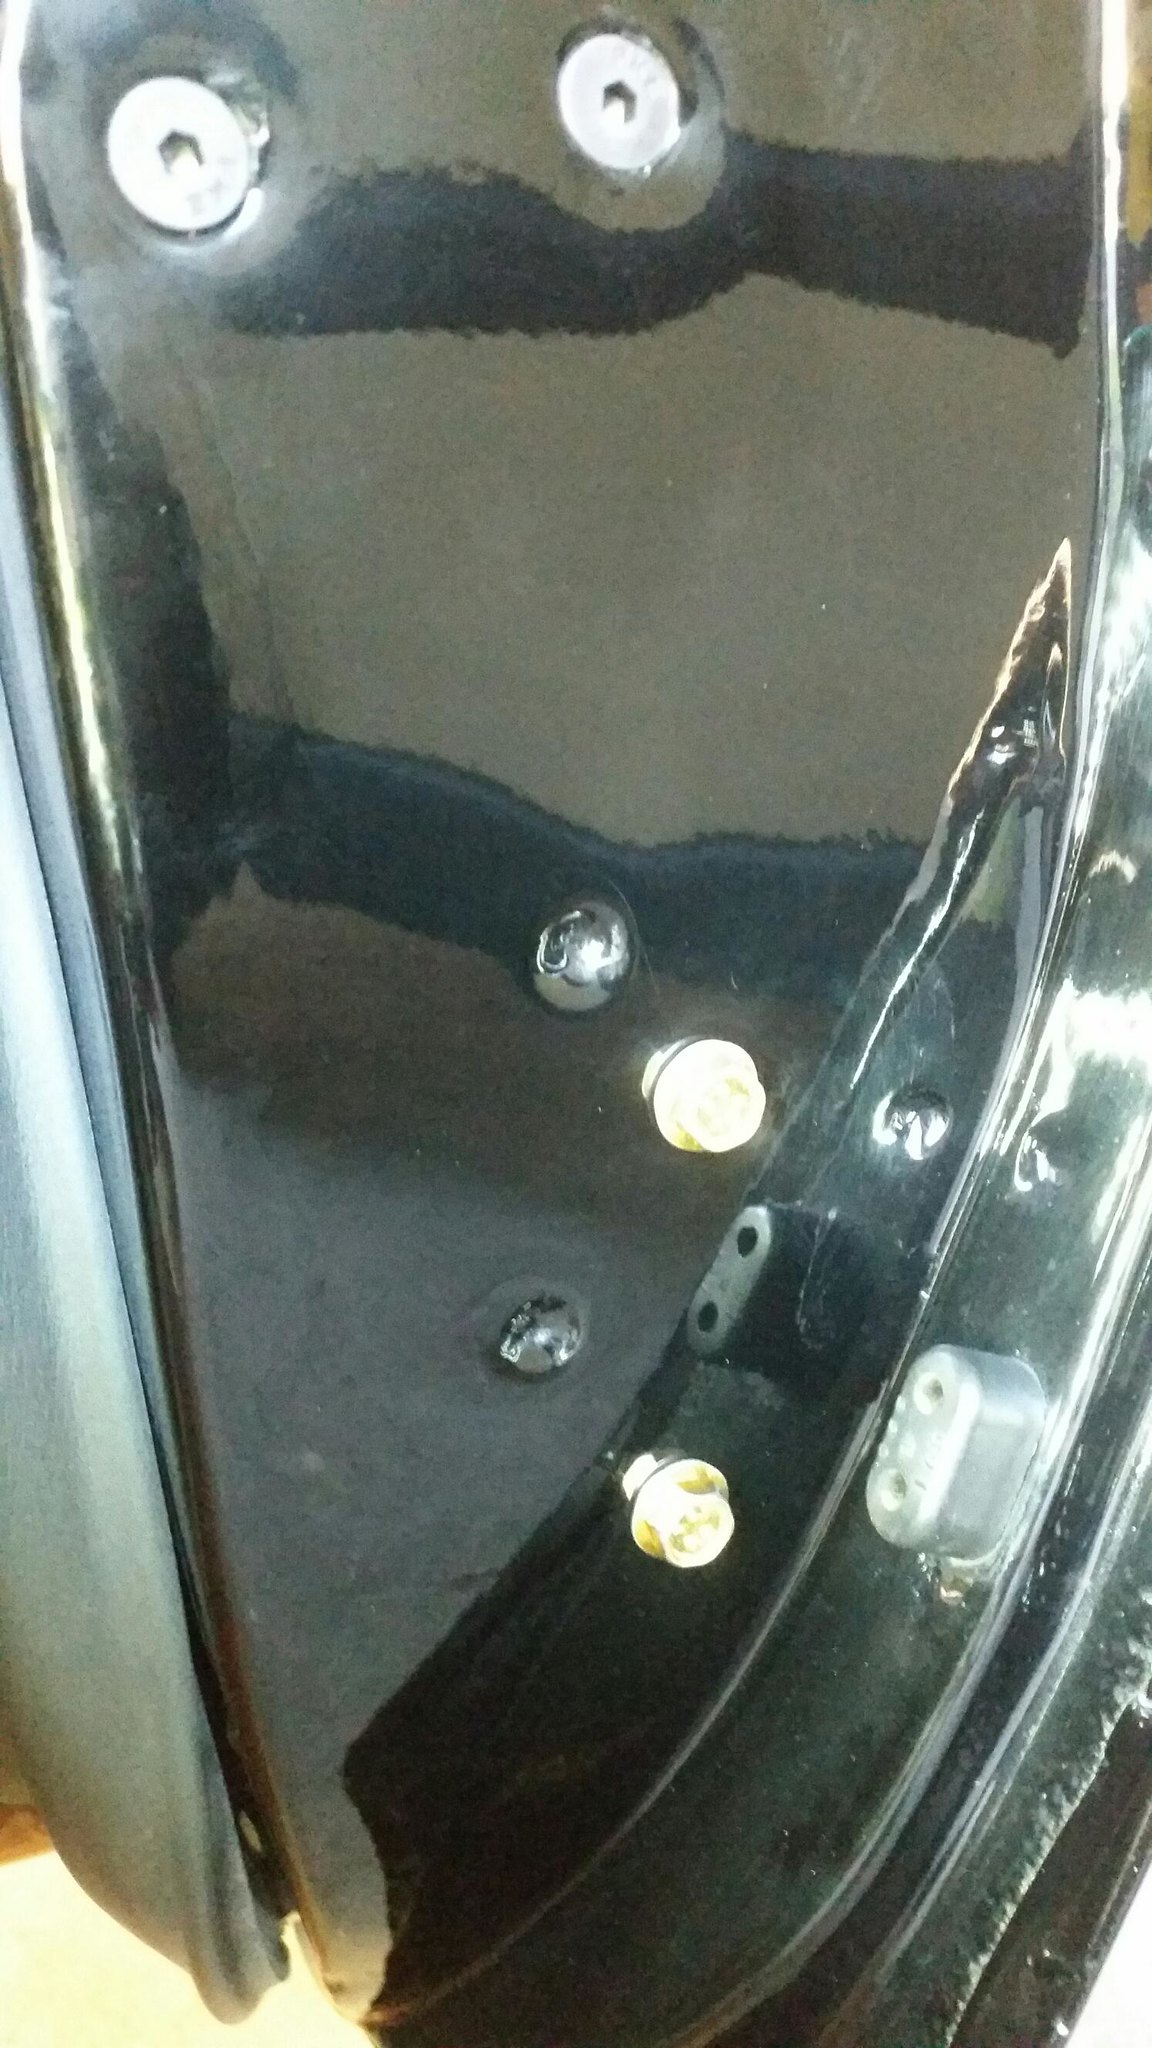
And with the bolts installed and assembly mounted up inside the door. These will be painted black with the door eventually.
 14942
14942 by
Aus78Formula, on Flickr
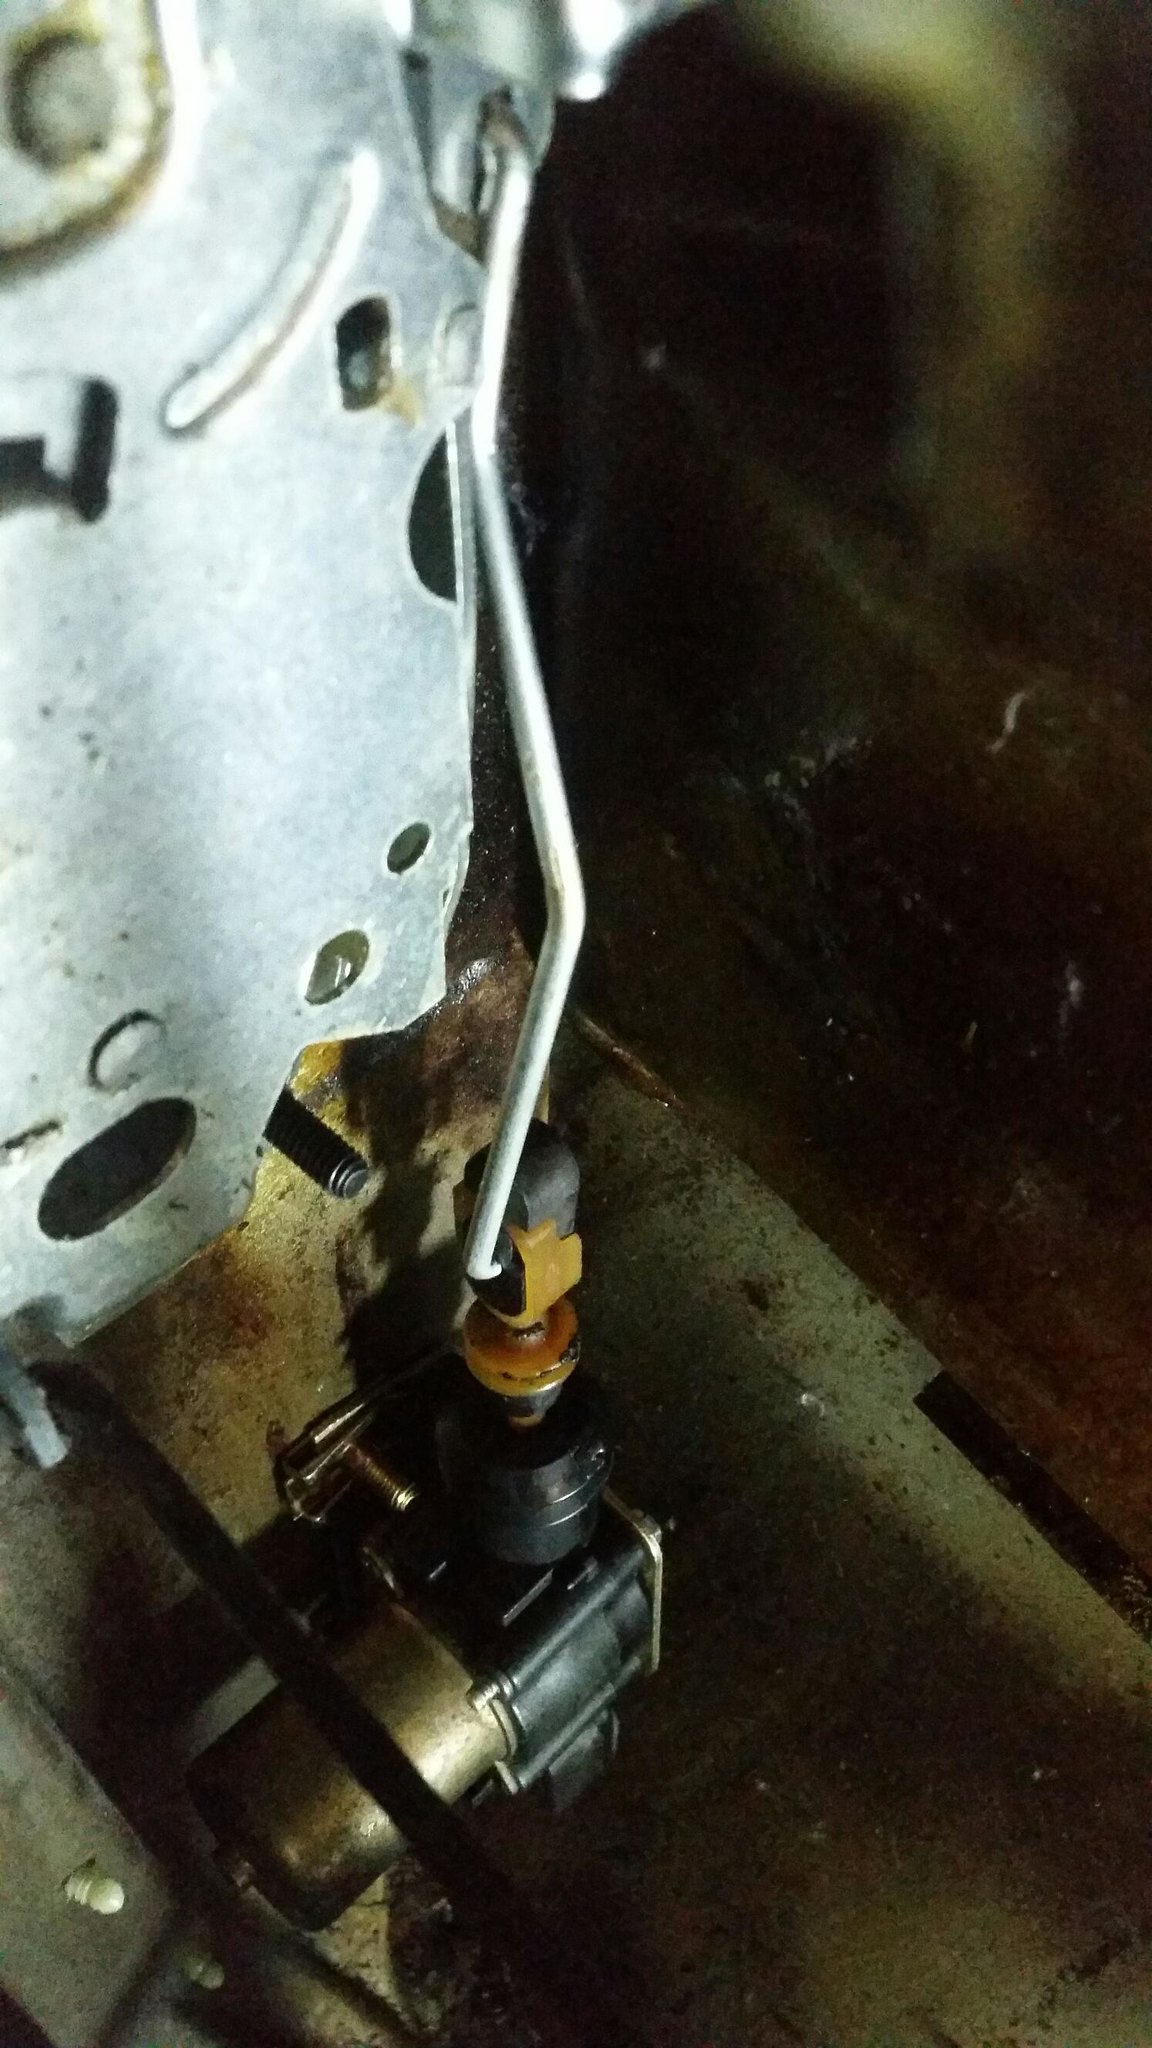
Here's the assembly inside the LH door. This is the rod with the flattened head at the top to match the slot in the arm of the door latch.
 14944
14944 by
Aus78Formula, on Flickr
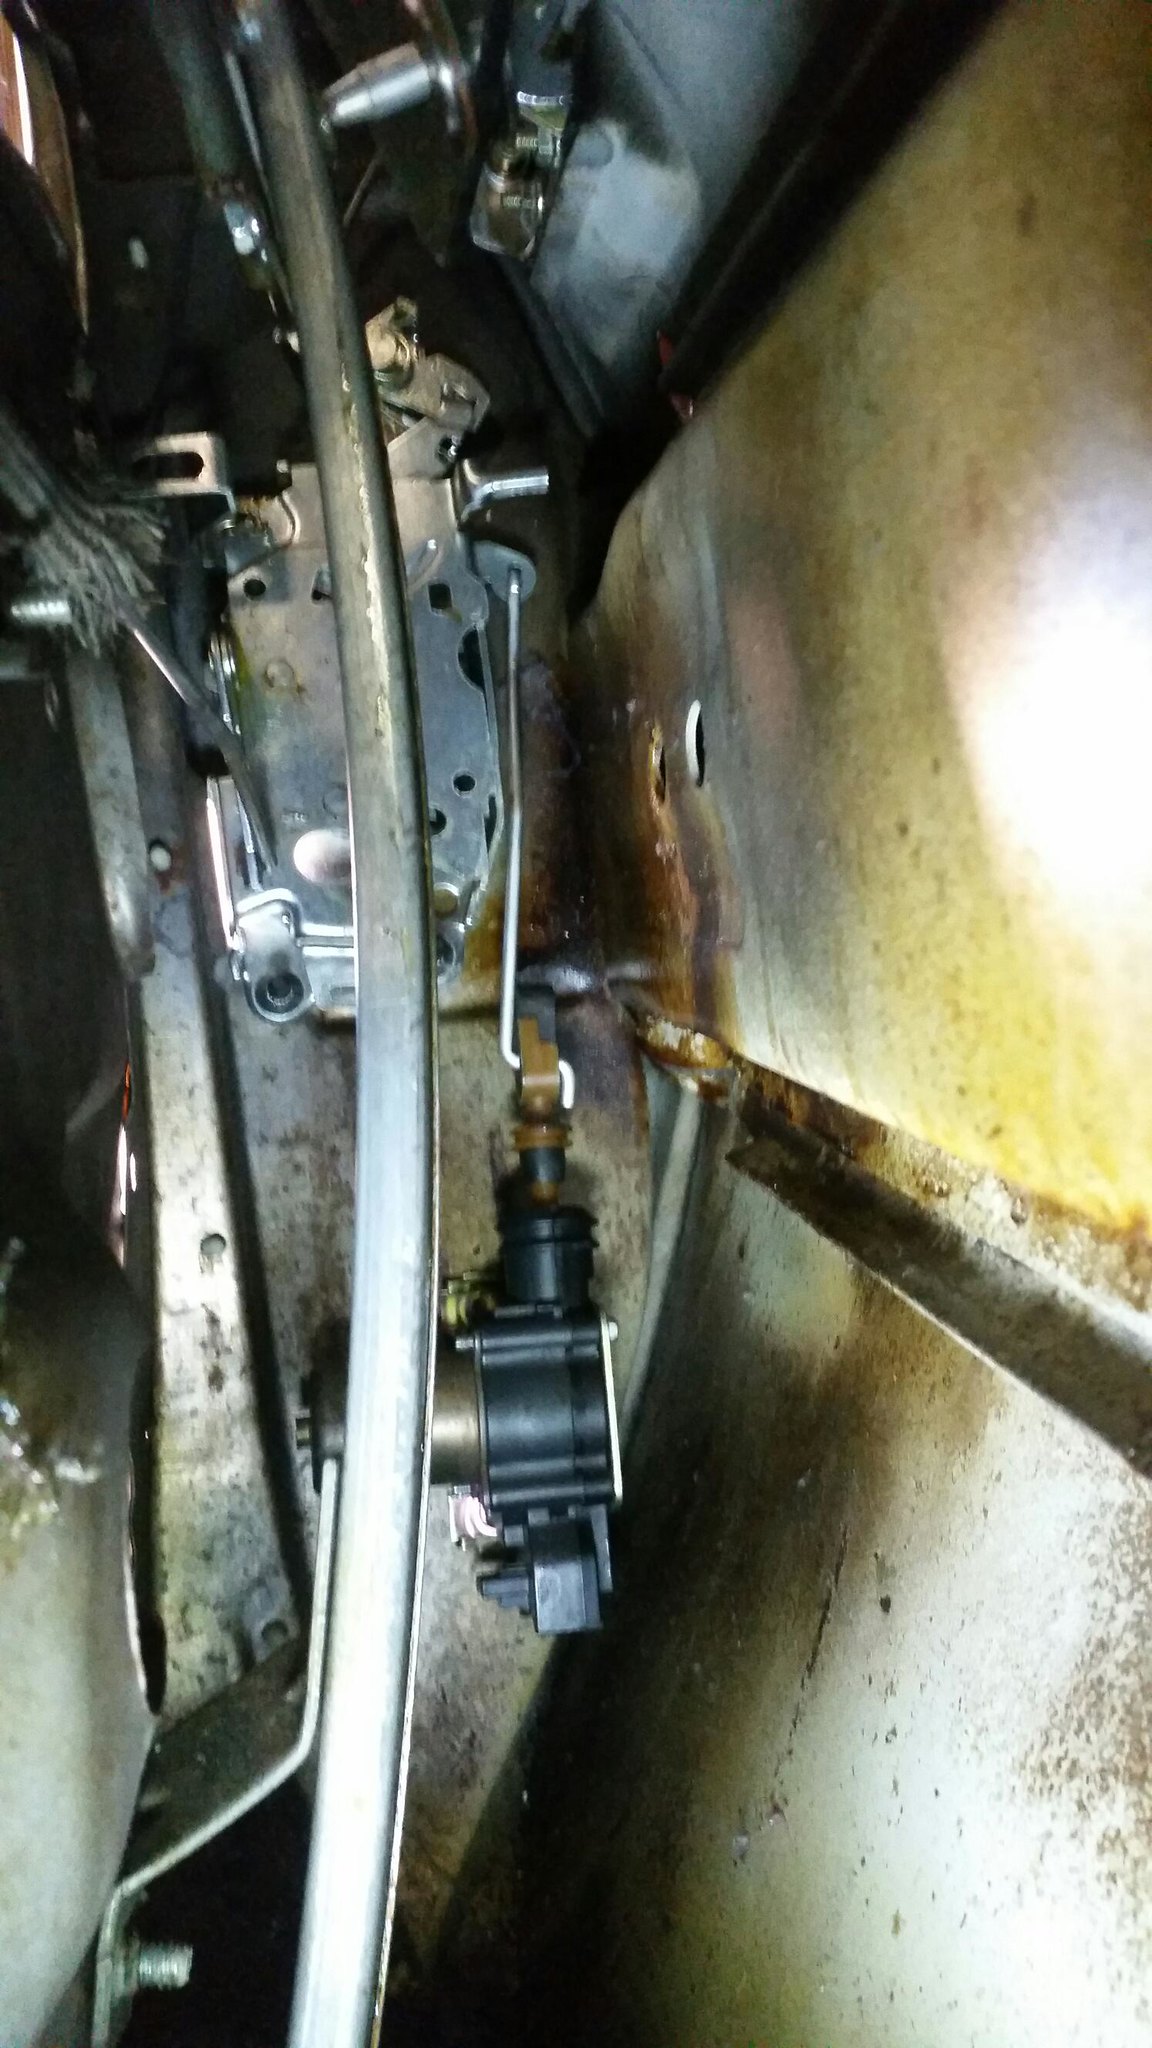 20180328_153901
 by
Aus78Formula, on Flickr
Here's where the fun starts. This is my RH door but with power lock dimples to suit a 77 model solenoid setup.
 20180328_162013
 by
Aus78Formula, on Flickr
Before I started the install I made a clear plastic template of both sides by mounting it off the 3 door latch holes that are countersunk in a fixed location.
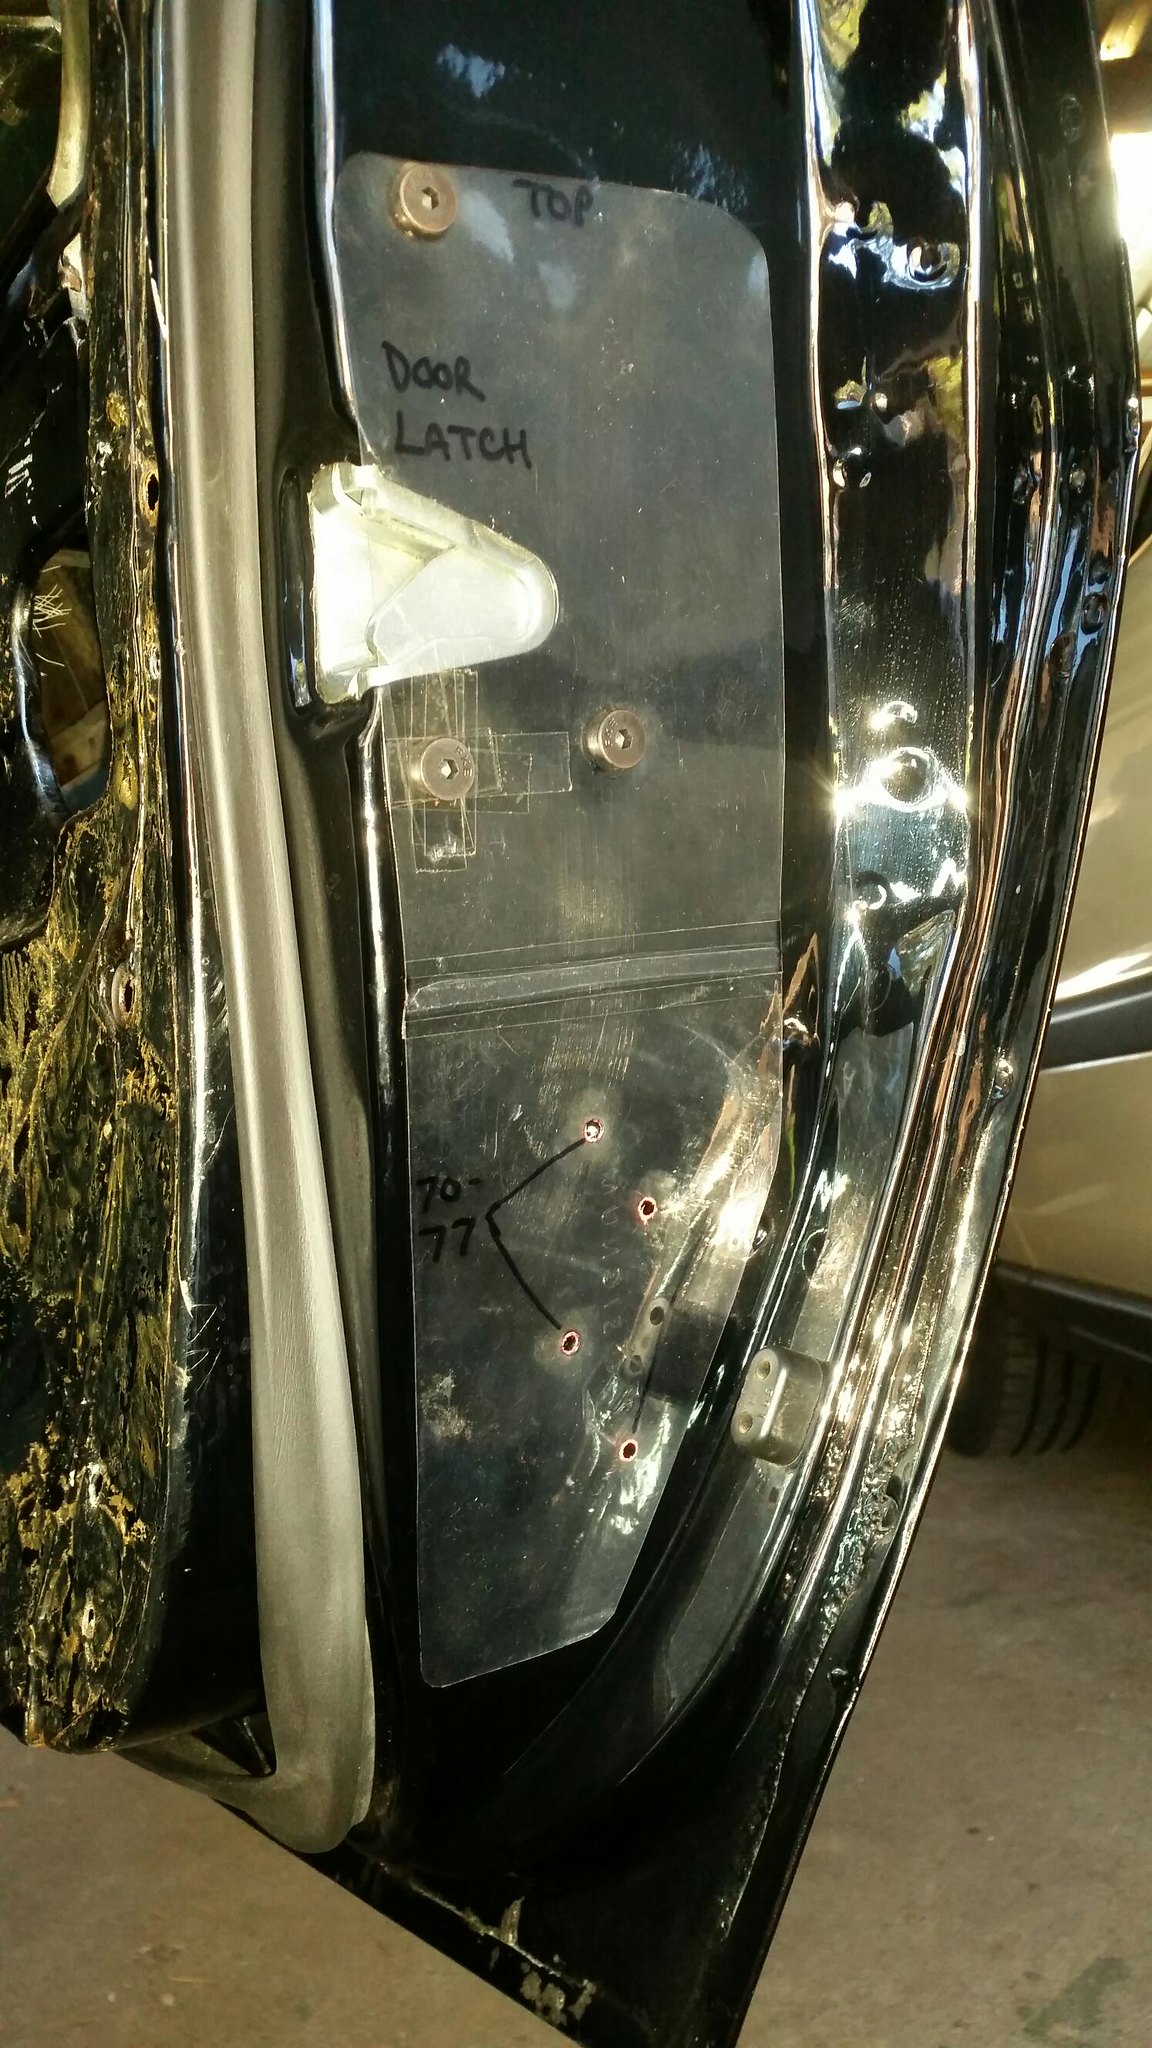 20180328_162349
 by
Aus78Formula, on Flickr
Here's how both the 70-77 and 78-81 dimples look on same door. The spacing is also different between the pairs. You can see there's dimples behind the 77 version, 78 I've now marked and centre-punched.
 20180328_162910
 by
Aus78Formula, on Flickr
And updated holes drilled alongside. I still don't know if I'll have the dimples filled in or welded up or just ignore, perhaps as a reminder of work done.
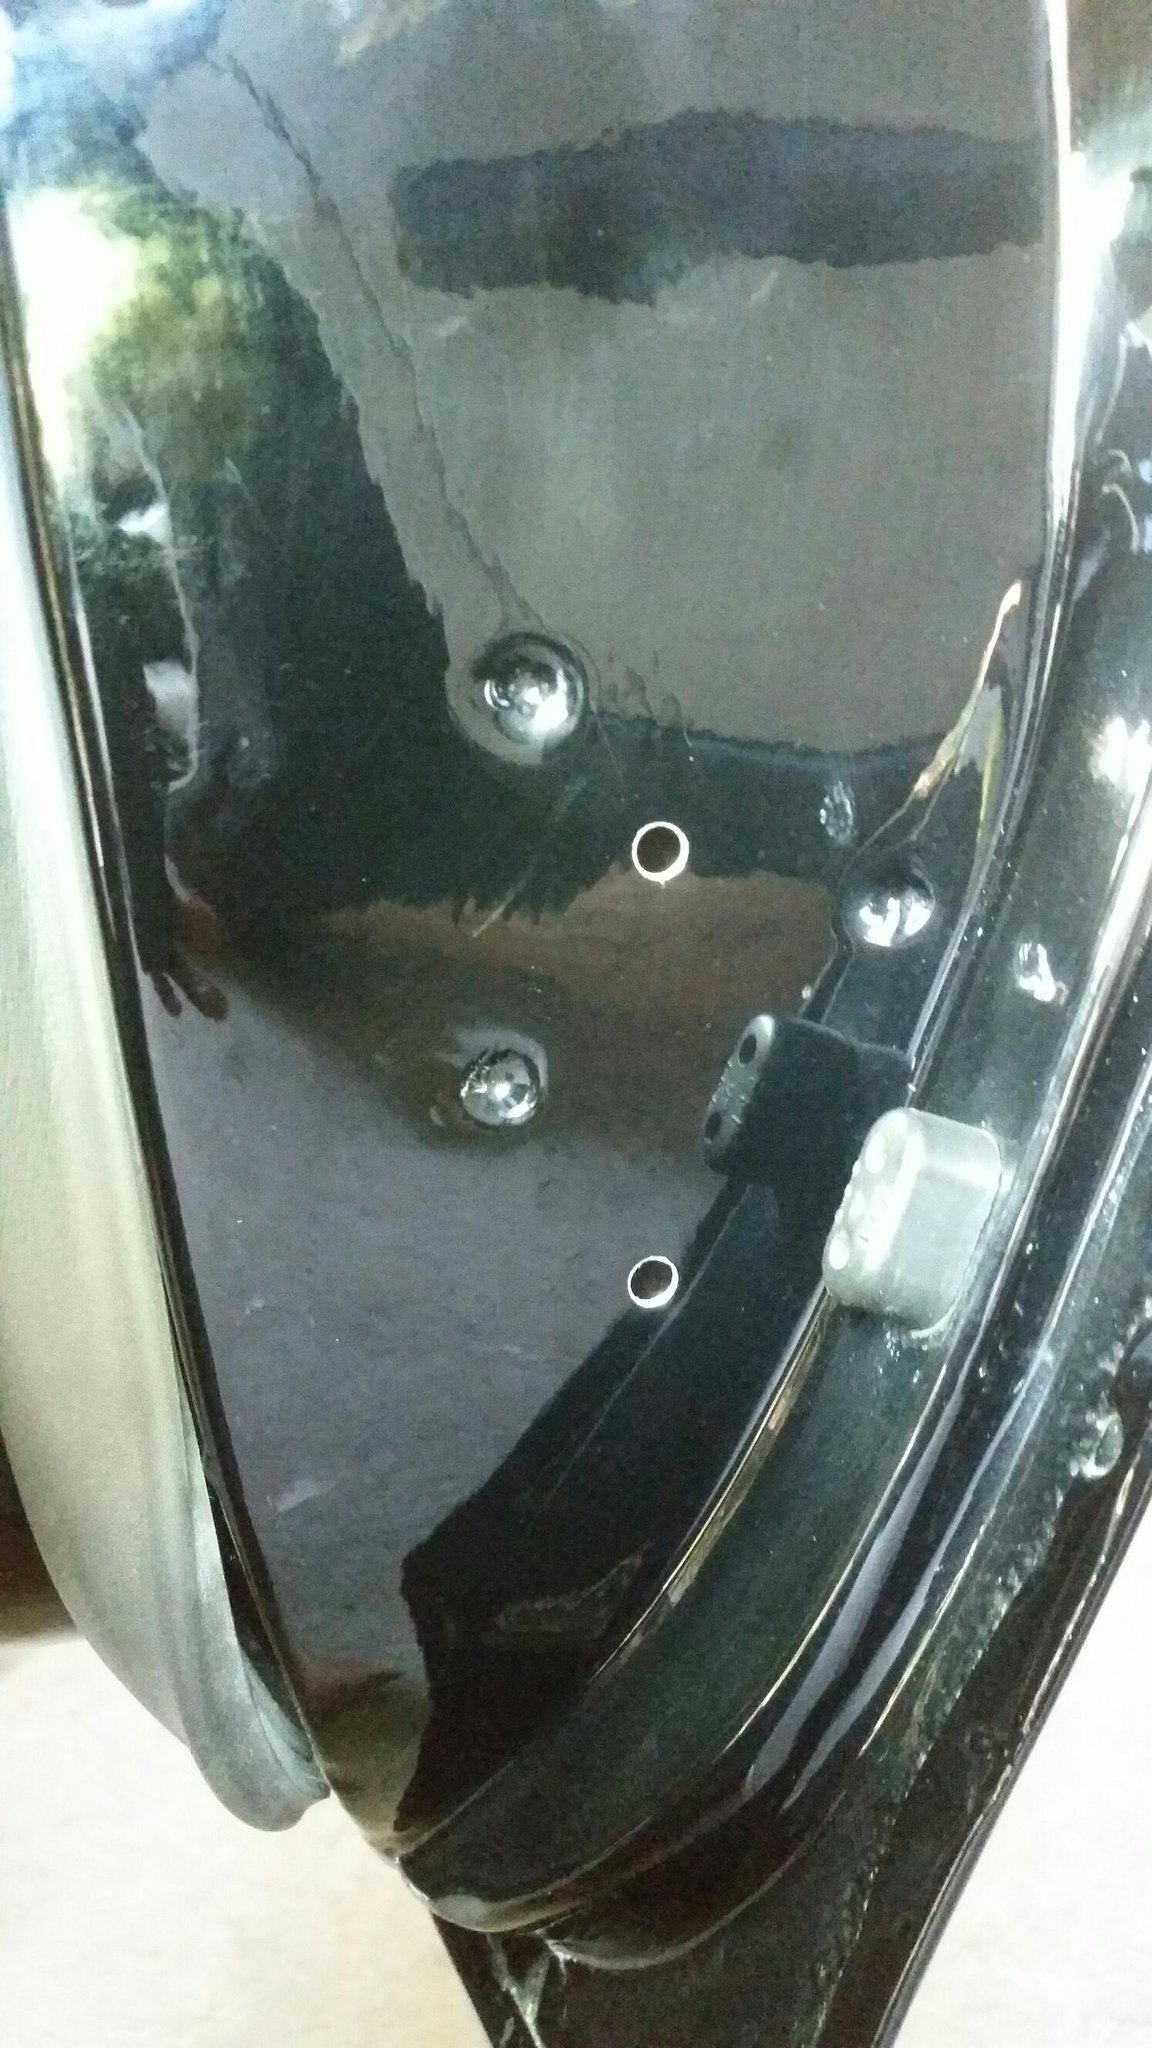 20180328_164206
 by
Aus78Formula, on Flickr
Same again, with assembly installed and new bolts in door. Again, these will be painted black, along with the door latch bolts.
 20180328_165136
 by
Aus78Formula, on Flickr
Inside the RH door, round rod at top to round hole in door latch assembly.
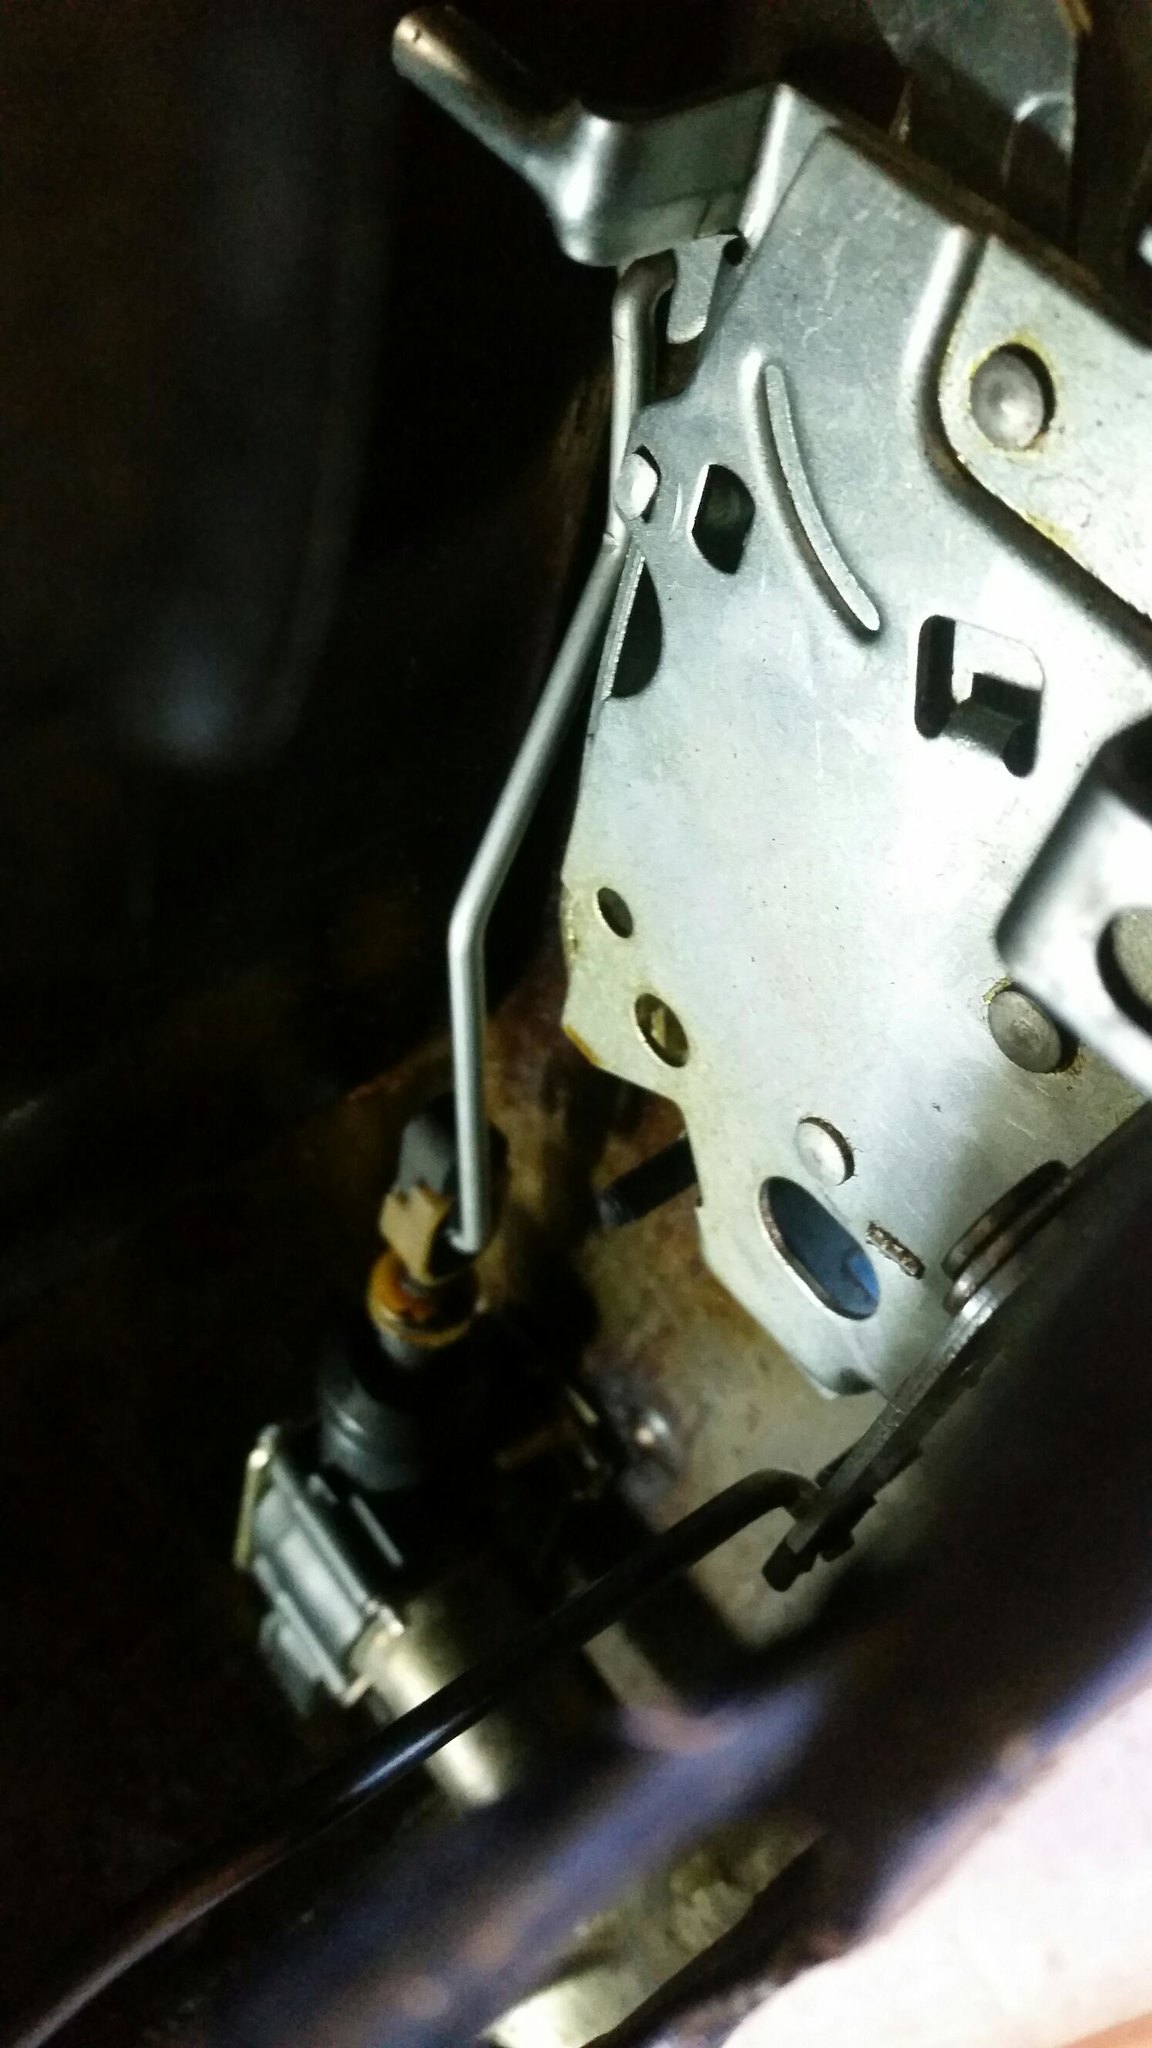 20180328_165228
 by
Aus78Formula, on Flickr
 20180328_165242
 by
Aus78Formula, on Flickr
Both sides tested and work perfectly. I then removed them for another day. They will be rewired with a more recent central locking kit with key remote which also includes trunk open and arms the immobiliser as well. No factory wiring beyond the plugs, no door trim locking switches.
Here's the original wiring and plugs that will be used for this section only. I have yet to find anyone offer a longer pigtail replacement, but they must exist given the huge numbers that used these over the years.
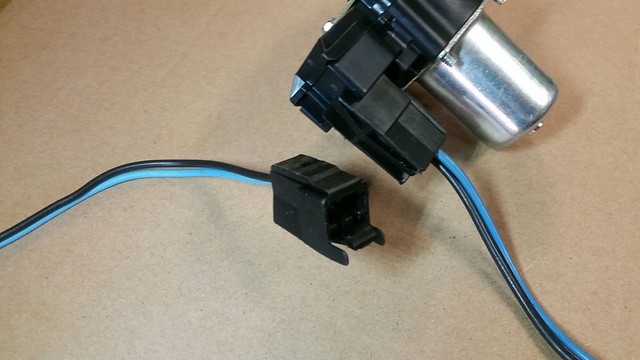 20180328_174222
 by
Aus78Formula, on Flickr
Don't forget that there are 3 harness holding retainers along the base of the door collision support channel. Here's an original setup. I will use some similar to the hood washer hose retainer rings, somewhat reusable and easy to install. The trunk light harness retainers, plus those used on roof for dome light harness are also similar retainers. I guess I'll need another set now.
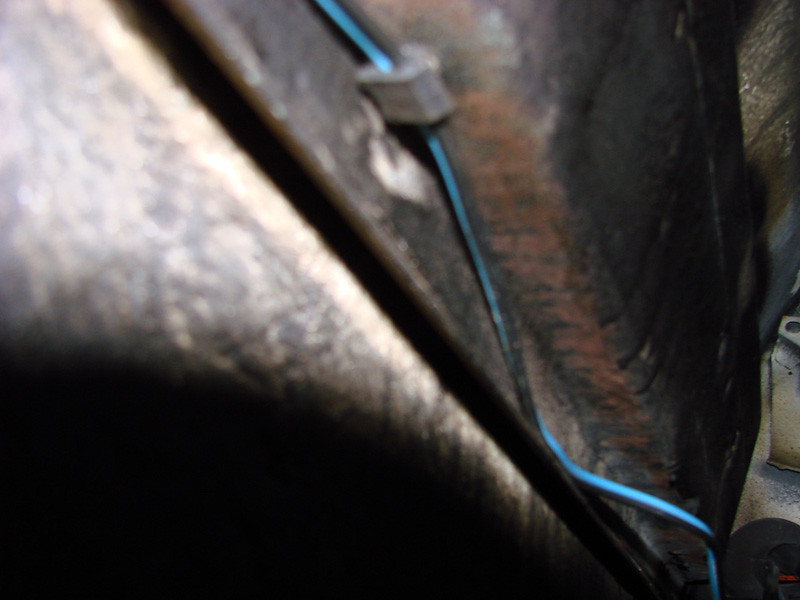 Firebird power door lock harness retainers1
 by
Aus78Formula, on Flickr
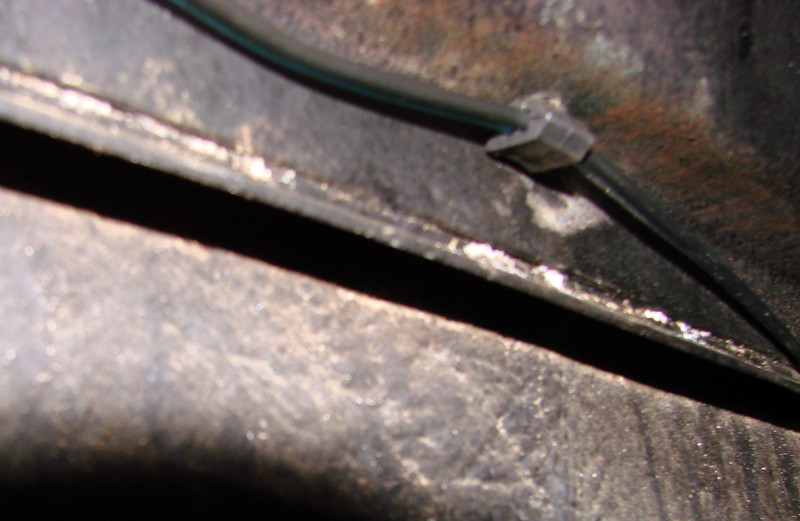 Firebird power door lock harness retainers2
 by
Aus78Formula, on Flickr
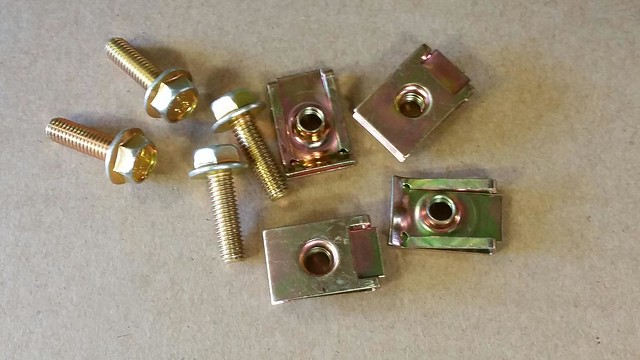
Since I wanted to keep the option of removing the assemblies, I came up with these bolts and speed nut clips in 6mm. There is no access inside the door for any sort of nut or to hold one while tightening, plus the bolt holes through the door head towards the body of the lock motors so not an option.
 20180328_170836
 by
Aus78Formula, on Flickr
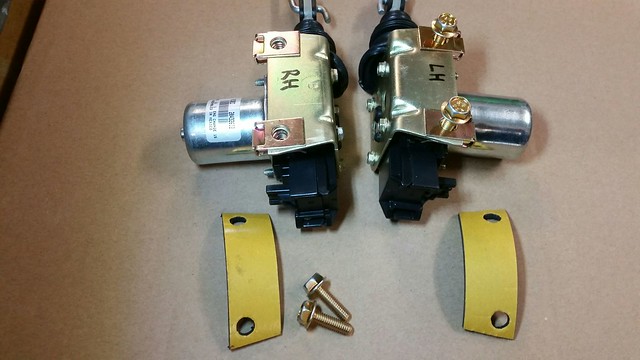
The speed nuts are a nice firm fit onto the original mounting plate brackets making for an easy install each time. And since the motors provide such a fast thud when operating I also chose to add a thin sponge insulator to each mounting face.
 20180328_173255
 by
Aus78Formula, on Flickr
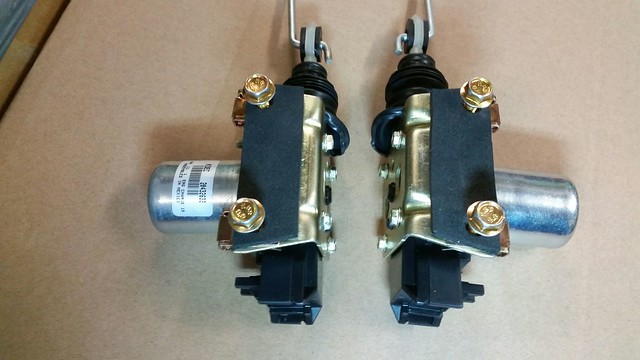
The completed units ready to install. The adhesive-backed sponge also goes over the clips with clearance holes punched for bolts. Don't forget to label the sides again, luckily I had the previous photo handy!
 20180328_173707
 by
Aus78Formula, on Flickr


