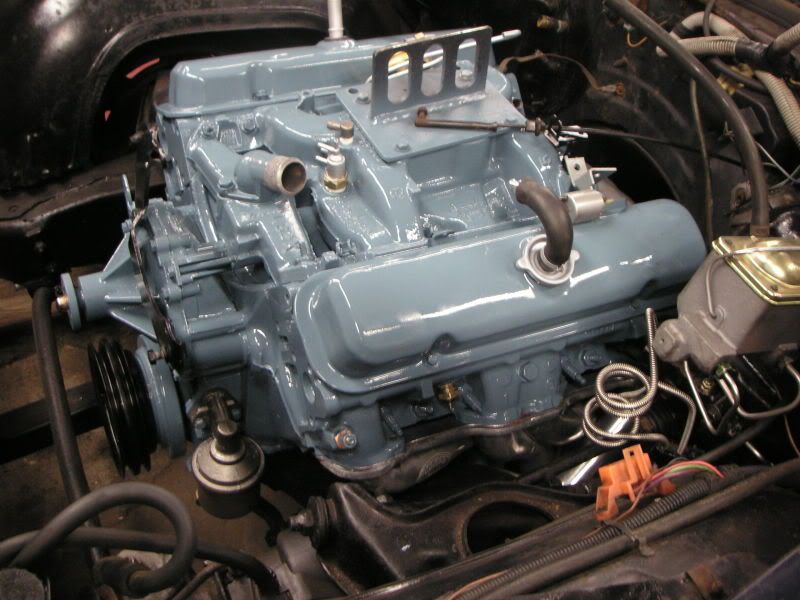
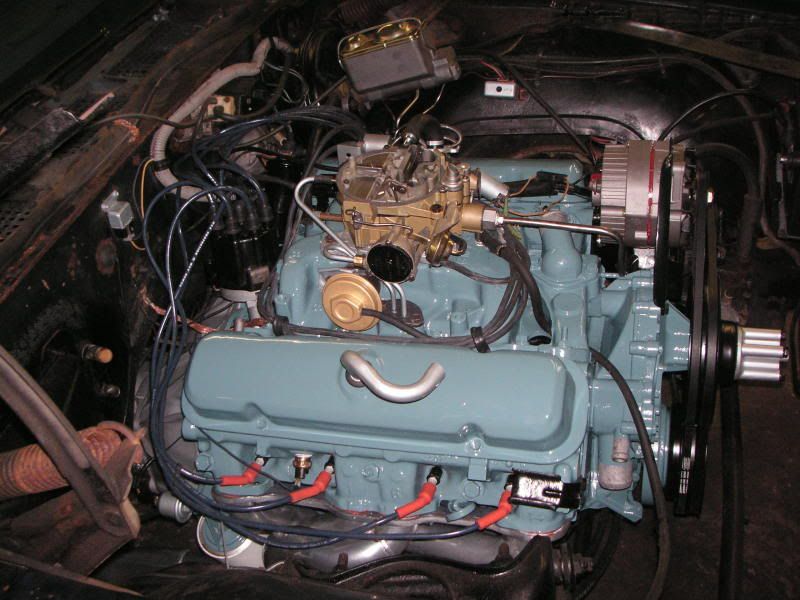
With intake
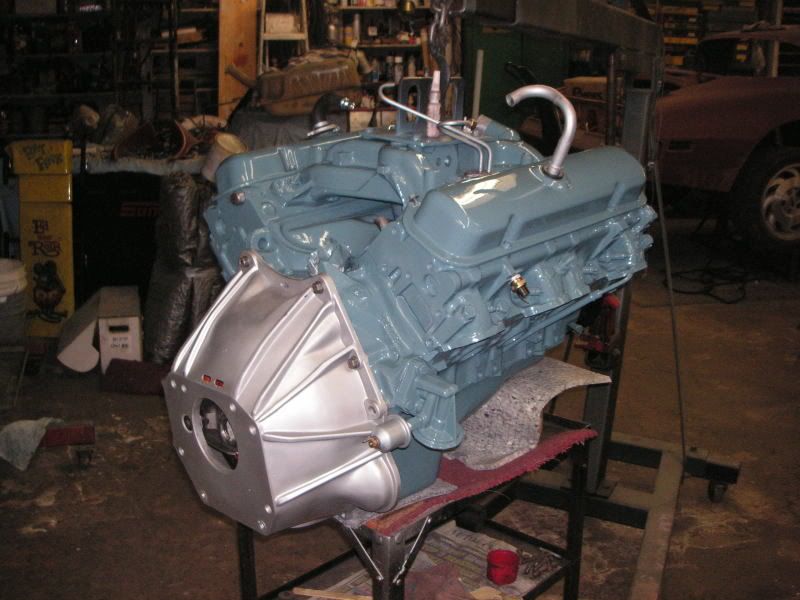
Centerforce dual friction clutch and bellhousing along with intake bolt-ons.
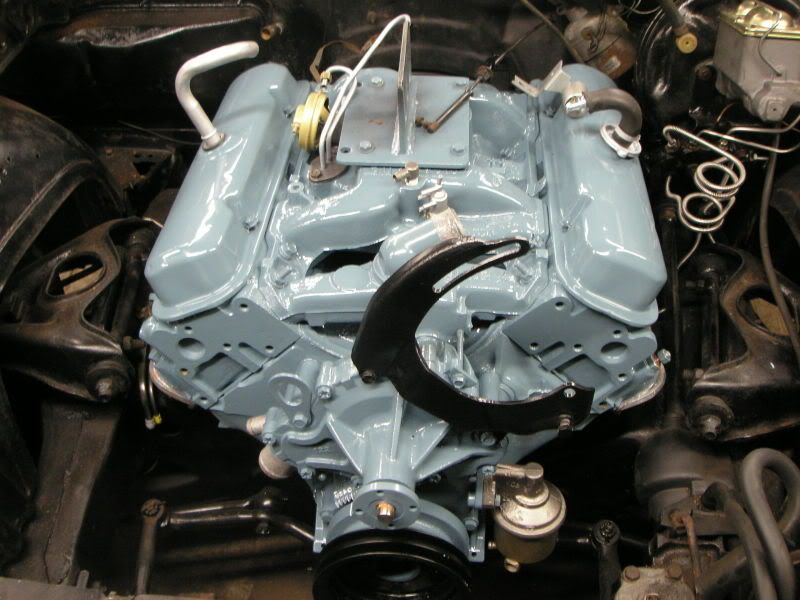
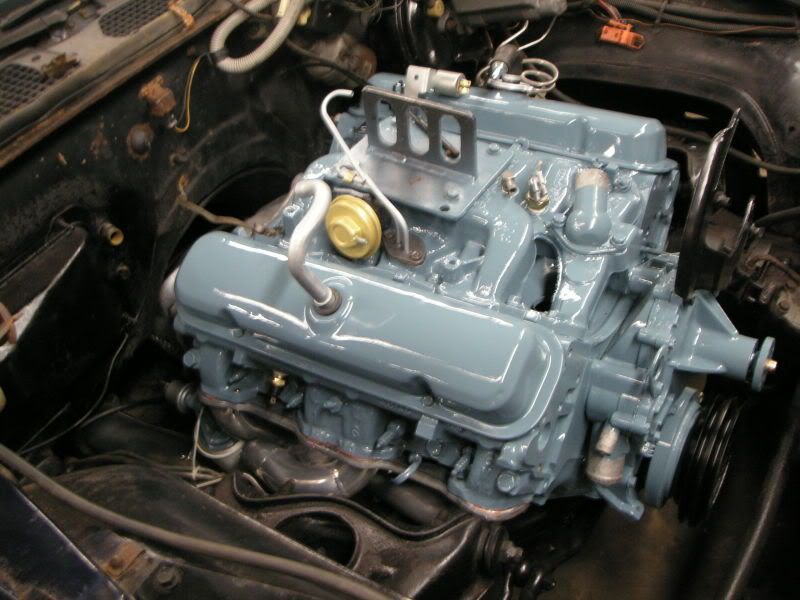
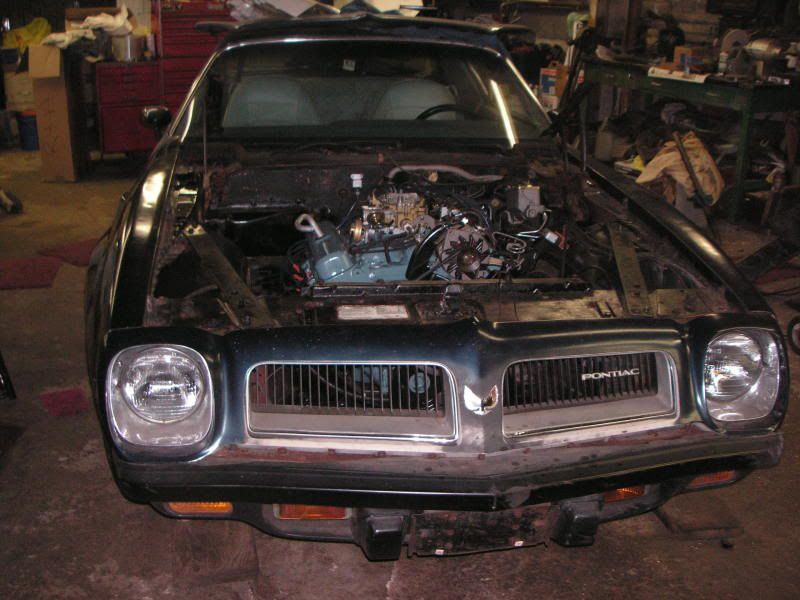
Some progress. Engine being reunited with car. Now, keep in mind, the objective of this project was to get the car back on the road and fix just what is needed. While it was very tempting to tear apart and redo the engine bay, I restrained from do so do to funds and time. Im already 2xs over anticipated cost due to unforeseen problems, difficulties and minor plan changes. I will clean the engine area up in due time. I will clean the wiring tomorrow before it is installed.
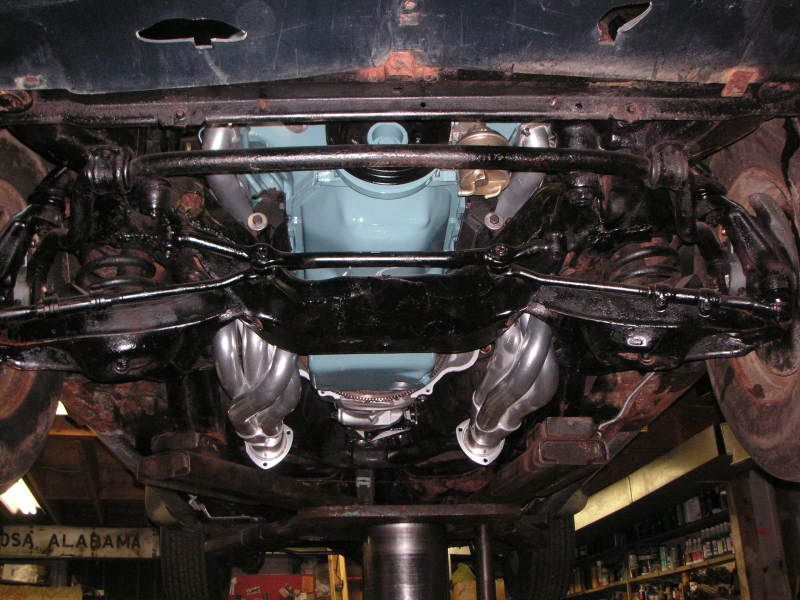
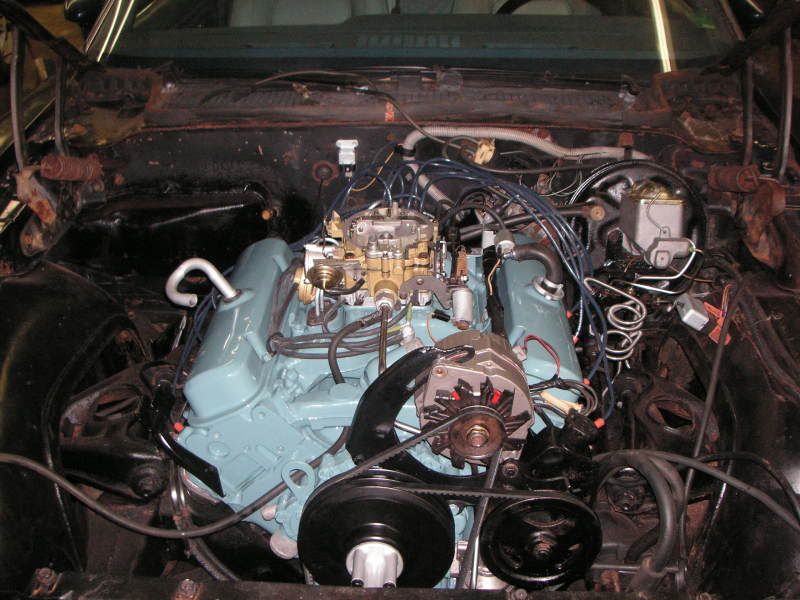
Transmission, linkage, long tube thingies are all installed awaiting for the new beginning.
Work continues tomorrow if it doesnt snow too much. Hoping to have most of the fuel, spark and electric systems installed and hooked up ready for the big moment of truth.
12/15/08
FIRE IN THE HOLE!!!!!!!!!!!!!!!!!!!!!!
WOOOOOOOOOOOO. 23 YEARS IN THE WAITING.
After the routine checking, priming, setting, and rechecks prior to starting an engine, combustion of air and fuel occurred. I do not have the new exhaust installed yet, so this was straight headers. Man what an awesome sound. I didnt run the engine too long as I dont have the radiator installed. When I installed a new engine, I always run it for a little without the cooling system installed incase the engine needs to be removed. Just enough to get a little heat built up and to check to see that everything appears to be working correctly or at least not to cause a concern. I must say that this HC-03 cam sounds nasty. I attempted to adjust the timing to at least hold an idle while keeping the revs up to prevent can failure, and this thing does not care for low rpms. I have the timing ball parked right now. Ill play with it more once the cooling system is installed so I can bring the engine up to full temp. Initial oil pressure registered just above 80 psi on the stock gauge. I guess the SD pump does pump at a higher pressure. Then again my 400 w/ a melling DS45 pump does 60 psi on initial start then drops to 40 when hot. I have to tidy some things up, but for the most part, the engine is pretty much done. Over time, Ill gather the correct parts to replace the old looking (egr, zinc plated switches, rear carb vacuum tee, ect) and incorrect appearing parts (plug wires, vacuum hoses, stickers, ect). I had a question where some of the wires went, but figured that out. The one connecter with a black and a tan wire goes to the A/C system which did not come on this car. I guess they used the same harness. I ran though the gears to see if the rest of the driveline had any issues. None so far. So, I will say another SD is up and running and soon to be terrorizing the streets and giving me thrills.

I would like to see if anybody has any pictures of 74 SD cars engine bays w/ the air cleaner removed so I can get so good views of the wiring, vacuum and clip layouts.
1/10/09
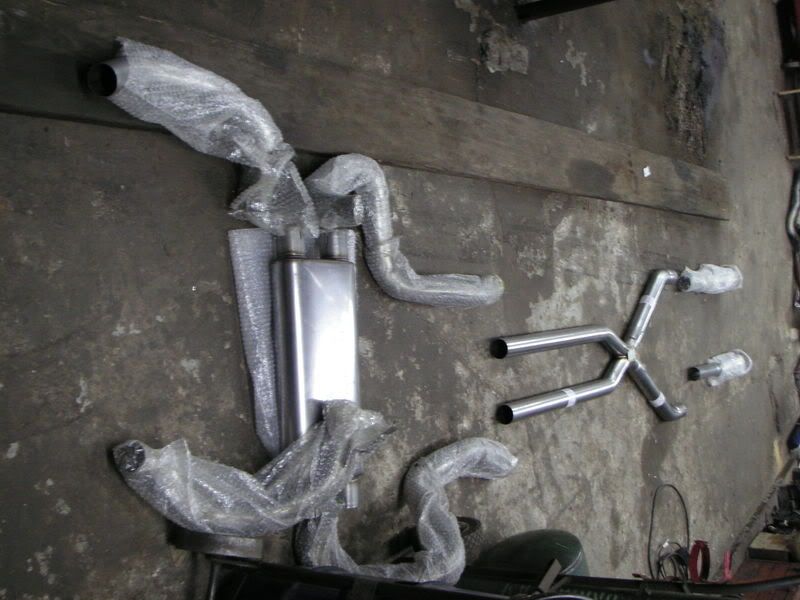
I have been waiting to do a final Part 1 completion post which will commence after the maiden voyage and break-in, but due to weather conditions, that may be awhile. I currently have the car just about ready to go expect for a quick carb & timing check & adjustment which I will do just before I take it out. I dont want to have too many start, run and stop sessions before I break-in the cam. Start the car, do a tune and go. I played with the initial carb settings and have the engine running better so I could move it in and out of the shop. I think have a total of 125 feet on the car so far. This was done prior to the exhaust being installed so I know the fuel will need to be adjusted a little. One of the things I noticed was fuel leaking from the carb and some adjustment screws missing. I found that the fellow whom I had rebuild and restore it , so he says, did not tighten the screws that hold the top, body and base of the carb together, left out some screws and the throttle shaft is a tad loose for my liking. Needless to say I am not exactly thrilled with the job done by the fellow who is renown as a Pontiac expert by magazines, word of mouth, ect. Especially what he charged and stated what the finial product would be. This is as far as I am posting about this as I will deal with him directly. I doubt I will be using his services or referring him to anyone any time soon. Back to happy thoughts. I had purchased a Pypes 2.5 crossflow system through a forum sponsor BSM. Other than the right over the axle tube being bent incorrectly and too short, I am happy with the system. I contact Pypes about this issue and they sent a new piece. While they said this is not common, it has occurred. The new piece fit perfect and is visually different than the original piece. The other thing that could bother some about the system would be the short tail pipes. The tips do not stick out as far as the stock system. They end just after the rear valance. The sound is a nice typical stock muscle car sound and a little louder than a stock factory crossflow system. I would prefer it to be quite a bit loader. It is actually quieter than my 79 T/A w/ flowmaster 50 series mufflers and a 400 engine. Although it is quite IMO, there is no restriction through the muffler aside from turbulence created from the perforations that hold the muffler packing. The bar clamps have been replaced with band clamps for a cleaner look and labor saver if it needs to be removed or adjusted later except for the upper muffler clamps which also attach to the hangers. The tubes are very difficult to separate once the regular clamps have been tightened as they literally crimp the tubes. I snugged them just to hold the tubes in place during installation and adjustment. The air cleaner is sandblasted, primed, filled and painted. Looks good. All I need now is some decals for the valve cover and air cleaner.
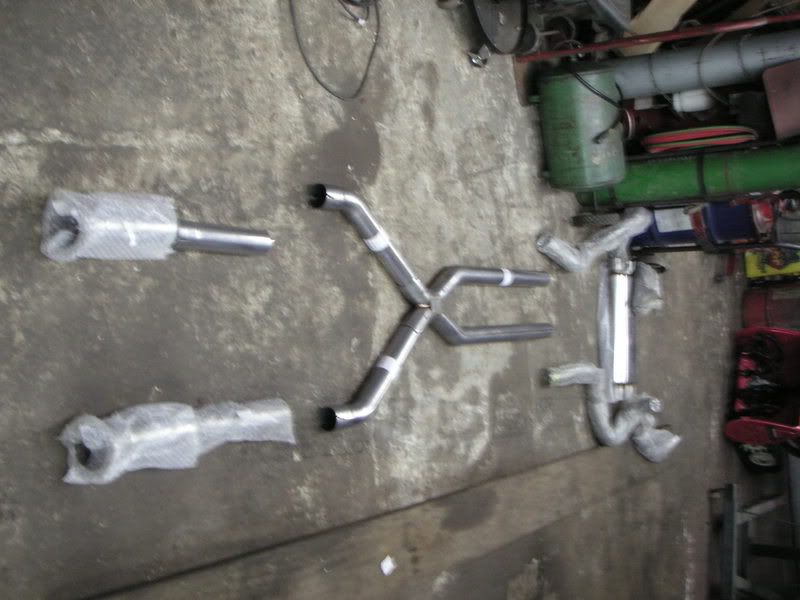
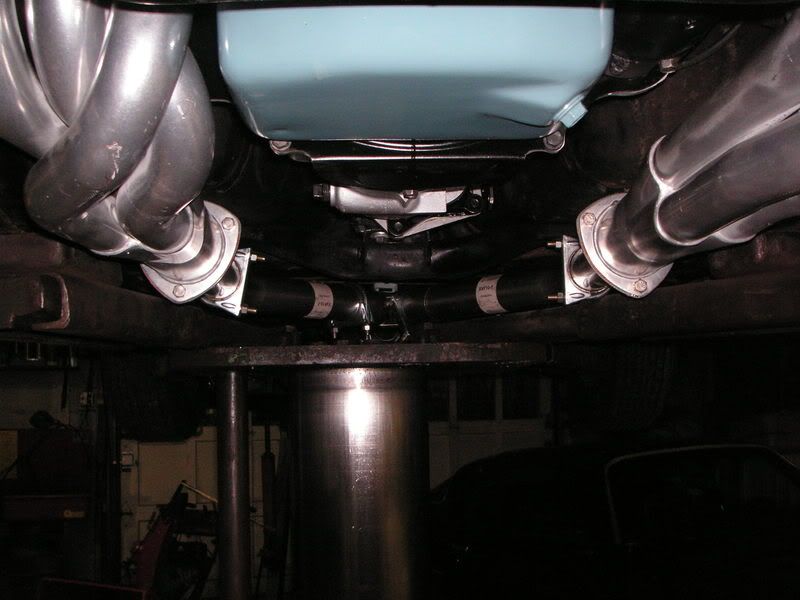
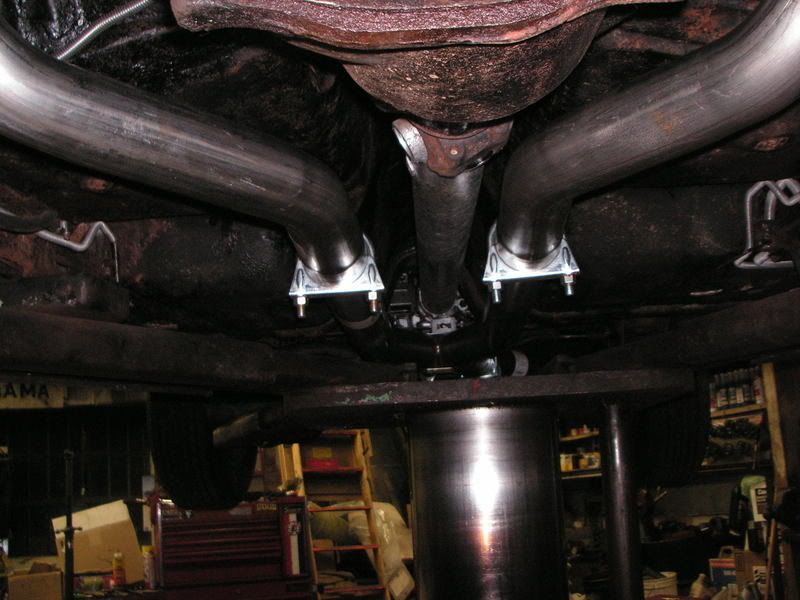
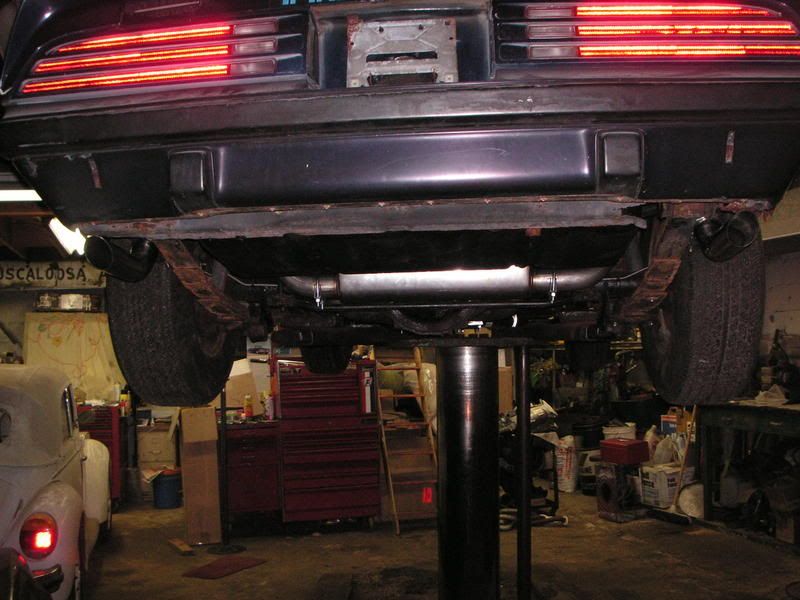
Some pictures of the exhaust prior to the band clamps and new over the axle tube.
New exhaust
From the front
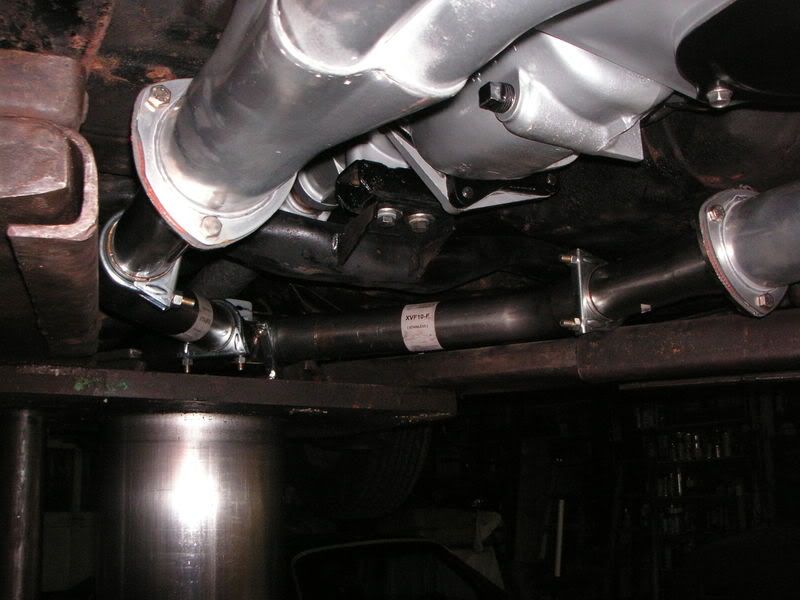
Fronm the rear
While I love snow, I do not like salt. If I took this car out in the salt, I would probably return with just a steering wheel and a radio knob. Hopefully. Ill get a nice day soon.
1/23/09
We had some OK, but not great weather for a change, so I decided it was time for the initial shake down. I took the car out and went about 2 3 miles only to notice the temp climb past the 180 degree mark and not slow down 220..240..OK something is askew. Keep in mind, its about 25 degrees ambient air temperature outside. Pulled into a parking lot found coolant violently escaping the radiator cap and overflow tank. Engine is quite warm, hoses are hot, radiator is hot but not excessive, however the center of the radiator was cool. Due to the cold air temp, then engine cooled down rather quickly. I managed to get the back to the shop after 2 more cool down periods. Today I was able to find some time to investigate the issue and long story short, the thermostat was not opening. I had another stock style t-stat that I replaced the Mr Gasket High Flow or No Flow in my case. Lets try this again. When out for a 10 mile drive only to return with a smile and a full tank of gas. I got some rather excited appreciation/ acknowledgement from a fellow walking down the street w/ a 24 pack of bud. He got the year correct too. The image of the T/A driver/ fan club lives on. I checked a few things, adjusted the timing and carb settings after that run and went out from more excitement. So far I have about 70 miles on the car so far since 1985. The speedo works now. I guess it was stuck somehow. Of course there are a few items that I need to attend to, but nothing unexpected. The major one is the rear suspension. It looks like this will be rebuilt soon. I have all the rubber, just need the leafs and shocks. Not sure if I will go stock or aftermarket detailed to appear stock. PT F-body may have an order soon. Other small items I noticed are:
Clock is not accurate. It works, but it is out of calibration.
Brake idiot light is on. E-brake is up. Possibly the switch in PV.
One tail pipe needs to be adjusted slightly
Shifter linkage needs to be fine tuned. It is not bad, but would like to see of I can adjust it better.
Need one 6x9 speaker.
The car rides very smooth aside from big bumps which result in a bank/ cluck due to the worn out susopension. The engine is silky smooth with plenty of power up to 3k. I have not been beyond that yet. The rings need to seat. After about 100 150 miles, Ill gradually increase the RPMs to about 5k until the first oil change at 500 miles. After that, I will spin the engine as far as it wants to go. I estimate around 6k. I have the rev limiter set there so Ill need to adjust that if the engine continues to pull. Failure to keep the revs low on a freshly bored engine could result in cracked piston rigs as they can catch on the boring hatch. I will say that this engine combo does not care to be below 1700-2000 RPM. Engine feed back tells me that there is a lot more excitement waiting to be had above 3k RPM.
All in all, I am happy with the way it turned out so far. The only issue I have with the engine is the paint on the center exhaust ports is burning. I have yet to find a paint that will hold up to the heat and not burn off the head in that area on any Buick, Olds or Pontiac engine. This wraps up Part 1 of this project. Part 2 will consist of rebuilding the suspension and replacing the drivers rear frame rail. Not sure when I will do this as I am turning my focus to the 78 Ive been build for 3 yrs. In the interim, I will be driving the 74 and enjoying the trill of the SD.
Part 2
6/7/09
Part 2 of this project will consist of repairing the drivers side rear frame rail and installing new springs, shocks and bushings as the main focus. Other items including resealing rear window, headliner installation, a possible redying of the interior plastics and detailing the differential if I get ambitious. Not to deviate from the overall scope of this project, any restoration or factory correct markings are not a high concern. Documentation of any markings, colors, ect will be noted and photographed for later use. This is not to say that some items may evidently be restored to factory specs along the way.
About 800 miles have been added to the car since 12/31 when it first fired after a 23 year hiatus. A few adjustments hear and there have resulted in a very thrilling and enjoyable 800 miles
well, maybe 795 enjoyable miles. I feel comfortable with the engine so Ill increase the rev limiter to 6000 RPM. I had it set a 4500 initially. I have had the car to a couple of cruise nights and to a show never failing to draw attention and more so, people looking rather surprised to see a real SD. I have observed what I consider to be two groups of on lookers. The first group would be a typical non car buff just out enjoying the event. This group casually glances in the direction of the car and continues on to a shinier object. The second group consists of car buffs or those containing some sort of automotive related knowledge. These are some times amusing as they act similar to the first group, but pause and back tract to the vehicle to double check if their eyes had just played a trick and saw an illusionary SD 455 decal. This is typically followed by a conversation of varying length between them & I. Moving on
..
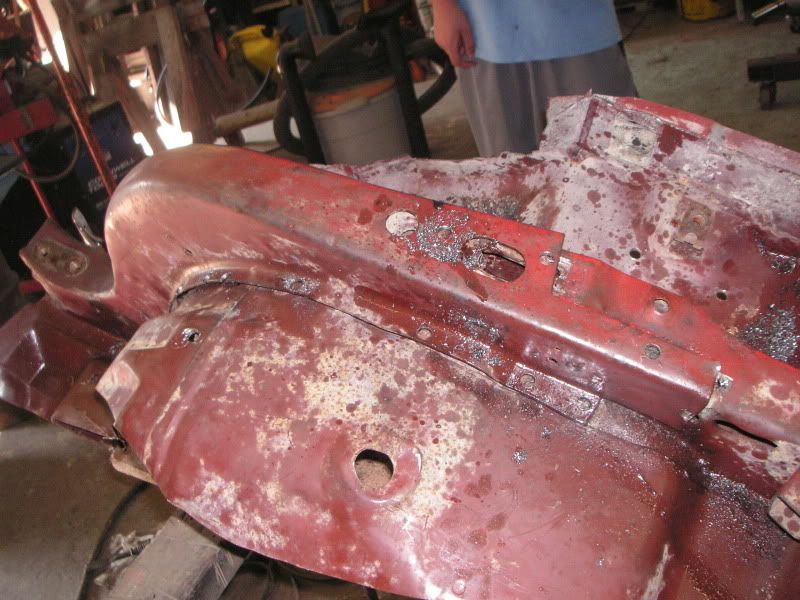
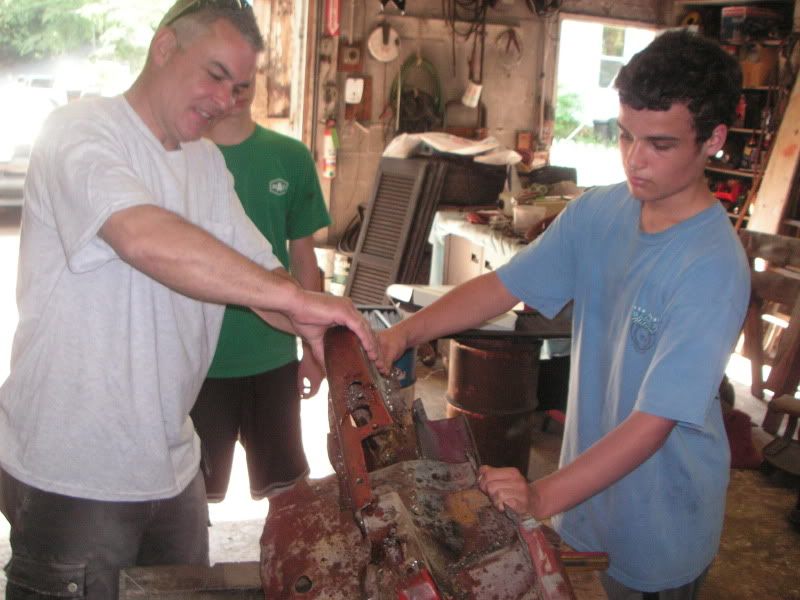
With Saratoga and Dayton rapidly approaching, time to complete part 2 is dimishing. What better way to get motivated to have a few newly acquainted T/A owners say Im available today and would like to help out and learn so I can do this to my car add supply grub. I had met this fellow and then his son at a local cruise who caught me as I was leaving. They of course fit into the abovementioned second group. [Names are with held until permission is granted] Todays task was to removed the donor frame rail and front leaf spring pocket from the donor section. This one was done as a practice test. Why the extra labor
practice makes perfect.
Some spot welds have been drilled. This was not as bad as I had anticipated. I did not anticipate the number of spot welds though. A good spot weld cutter is highly recommended, although a 3/8 drill bit will work. Center punching the spot welds is a must with either method.
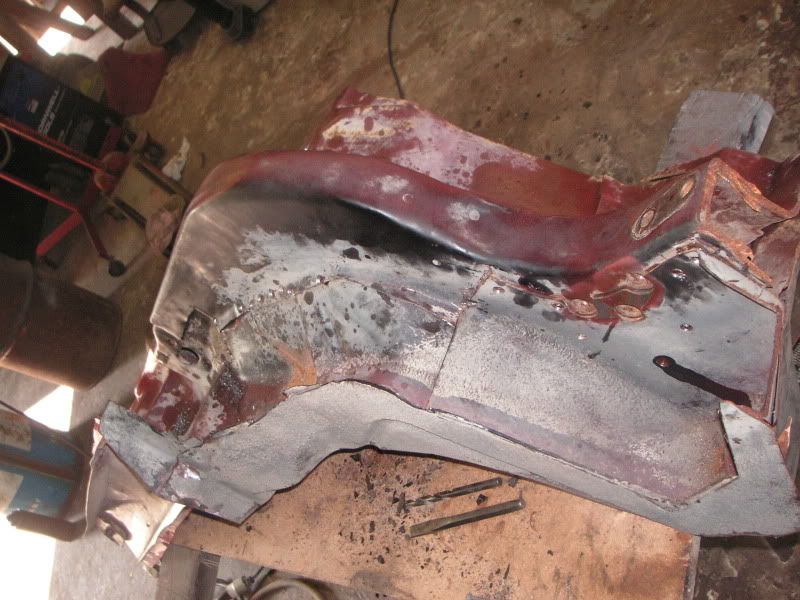
After a couple of hours, we broke the frame rail loose via hammer and chisel followed by an air chisel after waiting about 10 minutes watching the fellow T/A owner slave over manual labor.
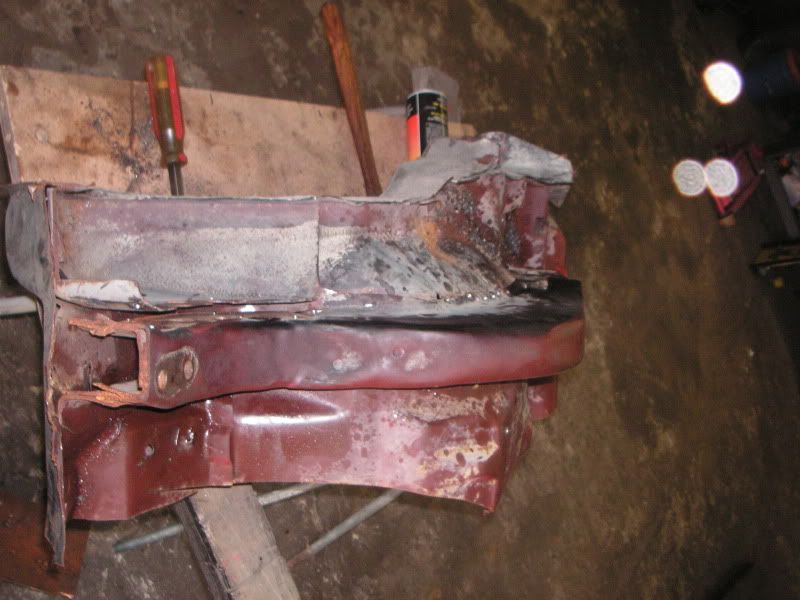
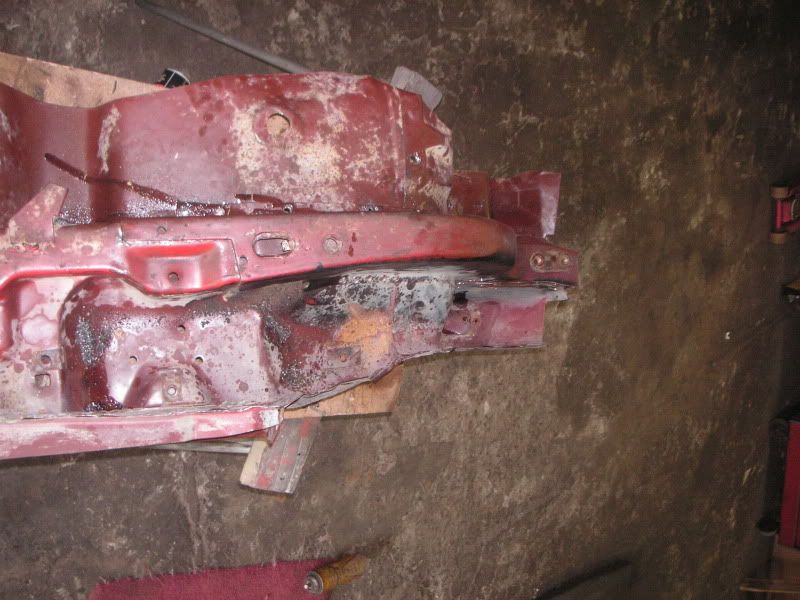
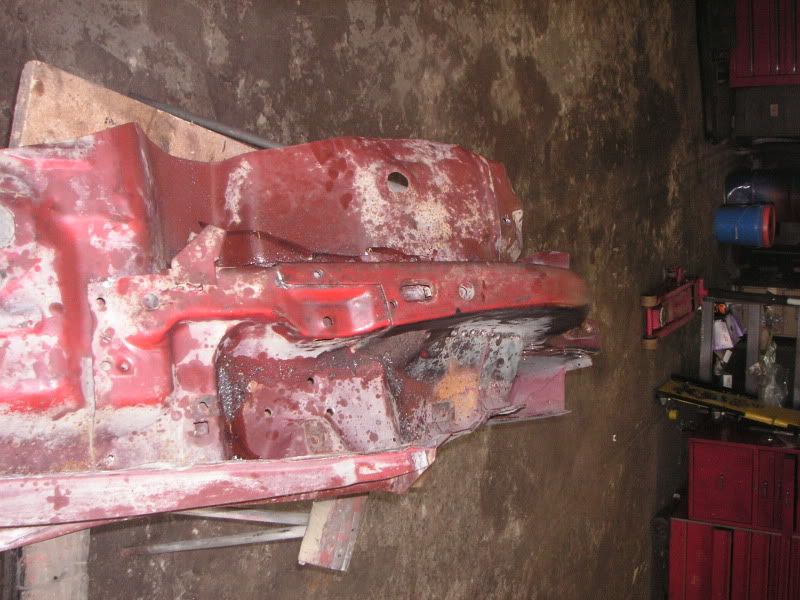
After a bink here and a bink there, success is granted and knowledge is gained.
Frame rail and pocket are both removed and cleaned. Ill sand blast them during the week and coat the inside with an etching / anti rust coating.
While disassembling the metal, I tried to position myself as if it were attached to the car. This worked well except for the spot welds attaching the pocket to the rocker panel lip. They are deep in the pocket preventing a straight shot with the drill. Due to time


